Android遊戲之半透明混合處理

Android遊戲之半透明混合處理

2D遊戲紋理渲染必須將『背景色』去除.JPEG格式不支持存儲像素點alpha值.將透明色alpha值設為零.需使用PNG格式.若紋理圖像沒有alpha通道時OpenGL ES自動將alpha設為1.但混合開銷很大而目前手機上GPU都不能對大量像素禁行混合.所以在需要時才啟用Blend『混合』.在OpenGL ES中啟動半透明混合處理
gl.glEnable(GL10.GL_BLEND);
設定『來源色』和『目標色』組合方程.
gl.glBlendFunc(GL10.GL_SRC_ALPHA, GL10.GL_ONE_MINUS_SRC_ALPHA);
啟用2D紋理渲染
gl.glEnable(GL10.GL_TEXTURE_2D);
渲染三角形

禁用2D紋理渲染
gl.glDisable(GL10.GL_TEXTURE_2D);
結束渲染後禁用混合
gl.glDisable(GL10. GL_BLEND);

Android遊戲之GLSurfaceView

Android遊戲之GLSurfaceView

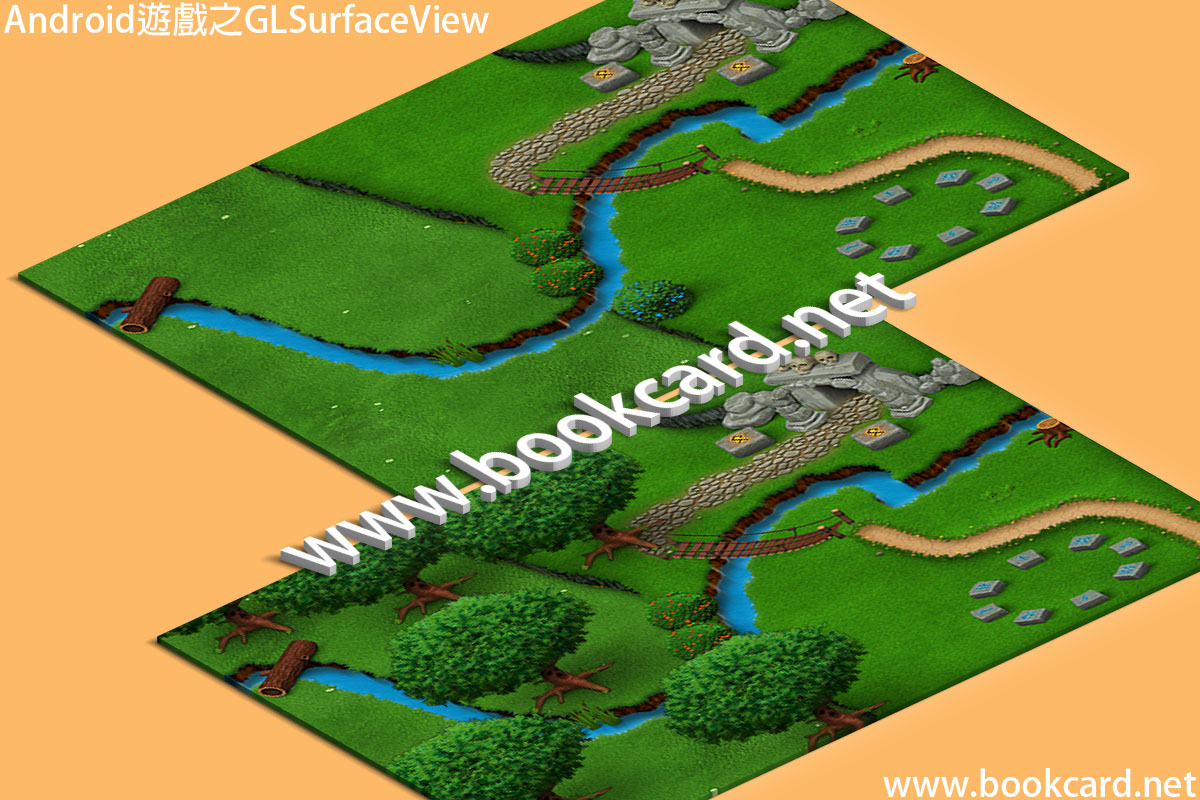
遊戲設計中通常『更新』『渲染』放在同一線程中.在Windows可以在主線程將『消息驅動』改為『實時驅動』.把『更新』『渲染』放在主線程中.而Android卻無法做到這點.但提供GLSurfaceView可建立獨立線程在背後實現『更新』『渲染』.你需要實現監聽接口GLSurfaceView.Renderer.並註冊到GLSurfaceView中.監聽接口需要分別重寫『創建』『調整大細』『渲染』.GLSurfaceView.Renderer可獲得GL10.通過它方可訪問OpenGL ES API.而GL10中10代表OpenGL ES 1.0標準.可以將GLSurfaceView封裝成獨立控件.從而在layout『佈局』中嵌入.

public class RenderView extends GLSurfaceView implements GLSurfaceView.Renderer {

每當Activity恢復或啟動創建. EGLConfig設置Surface顏色與深度

public void onSurfaceCreated(GL10 gl10, EGLConfig eglConfig);

當view尺寸發生改變時調用,傳入寬與高

public void onSurfaceChanged(GL10 gl10, int width, int height);

調用『渲染』『更新』完成幀繪製.但每秒不超過60幀.

public void onDrawFrame(GL10 gl10);

令外還需重寫『恢復』『暫停』

『恢復』重啟渲染線程,在Activity恢復顯示時在Activity.onResume()中調用

public void onResume();

『暫停』退出渲染線程,當Activity進入後臺時在Activity.onPause()中調用

public void onPause();

}

編輯layout『佈局』文檔main.xml添加

<net.bookcard.aa.RenderView

android:id=”@+id/render_view”

android:layout_width=”fill_parent”

android:layout_height=”fill_parent” />

定義view狀態

public static final int       STATE_INIT       = 0;// 初此

public static final int  STATE_RUN       = 1;// 運行

public static final int  STATE_PAUSED    = 2;// 暫停

public static final int  STATE_FINISHED  = 3;// 結束

public static final int  STATE_IDLE       = 4;// 閒置

int view_width,view_height;// 寬與高

int state = STATE_INIT;// 初此狀態

long    startTime ;// 啟動時間

創建Surface獲取屏幕

public void onSurfaceCreated(GL10 gl, EGLConfig eglConfig){

SCREEN  screen = GAME.getCurrentScreen();// 當前屏幕

if(state == STATE_INIT) {// 初此

Init(gl, this);

screen = GAME.getMainScreen();

GAME.setCurrentScreen(screen);

}

else {//  重新載入資源

ASSETS.reload();

}

screen = GAME.getCurrentScreen();

state = STATE_RUN;// 運行

startTime = System.nanoTime();// 獲取啟動時間

}

大小發生改變

public void onSurfaceChanged(GL10 gl, int width, int height){

this.view_width = width;// 寬

this.view_height = height;// 高

}

更新並渲染.System.nanoTime()返回納秒, 1000000000納秒=1秒.通過兩次時間測量計算間隔時間

public void onDrawFrame(GL10 gl){

SCREEN screen = GAME.getCurrentScreen();

if(state == STATE_RUN){// 運行

float deltaTime = (System.nanoTime()-startTime) / 1000000000.0f;

startTime = System.nanoTime();// 獲取當前時間

screen.update(deltaTime);// 更新

screen.present(deltaTime);// 渲染

}

else

if(state == STATE_PAUSED) {// 暫停

screen.pause();

}

else

if(state == STATE_FINISHED) {// 結束

screen.pause();

screen.dispose();

}

}

恢復渲染在Activity.onResume()中調用

public void onResume(){

super.onResume();

MUSIC.Resume();

}

暫停渲染在Activity.onPause()中調用

public void onPause(){

state = STATE_PAUSED;// 暫停

super.onPause();

MUSIC.Pause();

}

初此遊戲系統個部件

void Init(GL10 gl, GLSurfaceView view){

GRAPHICS.Init(gl,view);

SYSTEM.Init(context);// 系統

FileIO.Init(context);// 文件讀寫

BITMAP.Init(context);// 位圖

SOUND.Init(context,100);// 聲音

MUSIC.Init(context,100);// 音樂

TOUCH.Init(this);// 觸摸模塊

GAME.Init();//  屏幕切換系統

BATCHER.Init(1500);// 精靈批處理

ASSETS.load();// 資源

}

Android遊戲之紋理區域

Android遊戲之紋理區域

『紋理區域』指『紋理』中『矩形區域』.2D紋理通常尺寸較小.可以將多個2D紋理放在單一個紋理圖中.以提升OpenGL ES渲染性能.將其像素座標到紋理座標轉進行封裝.u1,v1為紋理座標左上角.u2,v2為紋理座標右下角.以確定紋理區域.值範圍0~1

public class REGION {

public TEXTURE texture;// 紋理

public float u1,v1,u2,v2;// 紋理坐標

像素坐標轉紋理坐標.輸入『像素』左上角與『寬和高』

public REGION(TEXTURE texture,float x,float y,float width,float height){

u1 = x/(float)texture.width;

v1 = y/(float)texture.height;

u2 = u1 + width/(float)texture.width;

v2 = v1 + height/(float)texture.height;

this.texture = texture;

}

}

Android遊戲之精靈批處理

Android遊戲之精靈批處理

OpenGL ES盡可能每次渲染多個精靈.以提高渲染性能.為此需要知道精靈『位置』『尺寸』『紋理區域』.『批處理』將多個渲染合拼在一起.這對GPU有利.批處理設立浮點數『緩存』保存頂點.該緩存區初此時需清空.定義『批處理』結構BATCHER.

public class BATCHER {

成員Buffer為浮點型數組用於存儲頂點.

private static float[] buffer;

成員indices為短整形索引.以三角形排列用於儲存頂點.

public static short[] indices ;

頂點列表用於批處理渲染

private static VERTICES vertices;

緩存寫入索引初此為零

private static int index = 0;

精零數量初此為零

public static int num = 0;

初次批處理.max精靈為最大量.

public static void Init(int max){

分配2D精靈頂點緩存,每個精靈有4頂點,每頂點要4個浮點數(空間坐標x,y兩個,紋理坐標u,v兩個)

buffer = new float[max44];

分配頂點緩存.『頂點』『紋理座標』『索引』

vertices = new VERTICES(max * 4, max*6, false,true);

分配索引每個精靈6個索引

indices = new short[max*6];

int len = indices.length;// 索引數組長度

index = 0;// 緩存寫入索引

num = 0;//  精零數量

生成頂點索引

for (int i=0,j=0; i < len; i += 6, j += 4) {

indices[i + 0] = (short)(j + 0);

indices[i + 1] = (short)(j + 1);

indices[i + 2] = (short)(j + 2);

indices[i + 3] = (short)(j + 2);

indices[i + 4] = (short)(j + 3);

indices[i + 5] = (short)(j + 0);

}

設置頂點索引

vertices.SetIndices(indices, 0, indices.length);

}

準備進行批處理渲染.首先綁定紋理.並將『精零數量』『緩存索引』置零

public static void Begin(TEXTURE texture){

texture.Bind();// 綁定紋理

num = 0;//  精零數量

index = 0;// 緩存寫入索引

}

結束批處理渲染.將頂點提交給OpenGL數組並觸發.綁定頂點數據後進形三角形渲染.然後取消數據綁定.每次調用繪畫時.向緩存區中添加4個頂點參數為『位置』『顏色』『索引』『紋理區域』

public void boolean End(){

vertices.SetVertices(buffer,0,index);

vertices.Bind();

vertices.Draw(GL10.GL_TRIANGLES, 0, num * 6);

vertices.Unbind();

}

批處理繪畫計算精靈中心『位置』及『寬和高』.和『紋理區域』.生成精靈『左下角』與『右上角』『空間座標』與『紋理座標』

public static void Draw(float x,float y,float width,float height,REGION region){

float halfWidth = width/2.0f;// 寬度一半

float halfHeight = height/2.0f;//高度一半

float x1 = x – halfWidth;

float y1 = y – halfHeight;

float x2 = x + halfWidth;

float y2 = y + halfHeight;

buffer[index++] = x1;

buffer[index++] = y1;

buffer[index++] = region.u1;

buffer[index++] = region.v2;

buffer[index++] = x2;

buffer[index++] = y1;

buffer[index++] = region.u2;

buffer[index++] = region.v2;

buffer[index++] = x2;

buffer[index++] = y2;

buffer[index++] = region.u2;

buffer[index++] = region.v1;

buffer[index++] = x1;

buffer[index++] = y2;

buffer[index++] = region.u1;

buffer[index++] = region.v1;

++num;

}

}

在調用時首先清理緩存並存入紋理.但只能對使用同一紋理精靈進行批處理.最後結束渲染.如下:

BATCHER.Begin(Texture);

BATCHER.Draw(X,Y,WIDTH,HEIGHT,Region);

BATCHER.End();

Android遊戲之頂點索引

Android遊戲之頂點索引

OpenGL均採用三角形列表進行渲染.每個三角形都有三個頂點.在有些情況下兩個或多個三角形會共用頂點.如上圖有兩個頂點具有相同『位置』『顏色』『紋理座標』.但甘浪費空間.更好解卻方法是將所有頂點保存在列表.而三角形頂點保存索引.OpenGL ES要求索引值使用短整數或字節.即OpenGL ES每次最多渲染65536個頂點.

我地需要一個Vertices類,用於存儲每個頂點『位置』『顏色』與『紋理座標』,並且它需要兩個選項.頂點是否『顏色』與『紋理座標』

public class VERTICES {

boolean color_have = false;//  擁有顏色

boolean texture_have =false;// 擁有紋理坐標

int vertex_size = 0;// 每個頂點所占大小

使用FloatBuffer保存頂點

FloatBuffer  vertex_array = null;

使用ShortBuffer頂點索引

ShortBuffer index_array = null;

頂點隊列分配記憶體,vertex_max為最大頂點量, index_max為最大索引量

VERTICES(int vertex_max,int index_max,boolean color_have,boolean texture_have){

this.color_have  = color_have;//  擁有頂點顏色

this.texture_have = texture_have;// 擁有紋理坐標

計算每頂點所占大小.顏色占4單元.紋理座標占2單元.2D座標占2單元.每個整數占4字節

int vertex_size = (2 + (color_have?4:0) + (texture_have?2:0) ) * 4;

因為OpenGL ES是以C API結口提供.無法直接使用JAVA數組.因此你需要C數組系統堆棧記憶體.而非JAVA虛擬機記憶體.需要 FloatBuffer分配頂點記憶體.

vertex_max為最大頂點量.

ByteBuffer buffer = ByteBuffer.allocateDirect(vertex_size * vertex_max);

將『網絡字節』改為『主機字節』或稱為『CPU字節』

buffer.order(ByteOrder.nativeOrder());

獲取整數數組

vertex_array = buffer.asIntBuffer();

每個短整形占兩個字節.index_max為最大索引量

buffer = ByteBuffer.allocateDirect(index_max * Short.SIZE/8);

將『網絡字節』改為『主機字節』

buffer.order(ByteOrder.nativeOrder());

頂點短整數數組

index_array = buffer.asShortBuffer();

}

將頂點提交給OpenGL數組並觸發

public void SetVertices(float[] vertices,int offset,int count){

vertex_array.clear();// 清空緩存.設定當前位置

int len = offset + count;

for(int i=offset, j=0; i < len; i++, j++)

vertex_Buffer[j] = Float.floatToRawIntBits(vertices[i]);

vertex_array.put(vertex_Buffer, 0, count); // 寫入數據.移動當前位置

vertex_array.flip();// 觸發

}

將頂點索引提交給OpenGL數組

public void SetIndices(short[] indices,int offset,int count) {

index_array.clear();// 清空緩存.設定當前位置

index_array.put(indices, offset, count); // 寫入數據.移動當前位置

index_array.flip();// 觸發

}

綁定數據

public void Bind(){

GL10  gl = GRAPHICS.gl;

啟用頂點數組

gl.glEnableClientState(GL10.GL_VERTEX_ARRAY);

設置當前寫入位置0

vertex_array.position(0);

設置頂點指針,每個頂點兩個元素.xy兩分量

gl.glVertexPointer(2, GL10.GL_FLOAT, vertex_size, vertex_array);

if(color_have == true){//顏色

啟用頂點顏色數組

gl.glEnableClientState(GL10.GL_COLOR_ARRAY);

設置當前寫入位置2

vertex_array.position(2);

設置顏色指針,RGBA四分量

gl.glColorPointer(4, GL10.GL_FLOAT, vertex_size, vertex_array);

}

if(texture_have ){// 紋理坐標

啟用紋理坐標數組

gl.glEnableClientState(GL10.GL_TEXTURE_COORD_ARRAY);

vertex_array.position(color_have?6:2);// 寫入位置

設置紋理坐標指針,UV兩分量

gl.glTexCoordPointer(2, GL10.GL_FLOAT, vertex_size, vertex_array);

}

}

取消綁定數據

public void Unbind(){

GL10 gl = GRAPHICS.gl;

關閉頂點紋理數組

if(color_have)

gl.glDisableClientState(GL10.GL_COLOR_ARRAY );

關閉頂點顏色數組

if(texture_have)

gl.glDisableClientState(GL10.GL_TEXTURE_COORD_ARRAY);

}

繪畫三角形

public void Draw(int mode,int offset,int count){

GL10 gl = GRAPHICS.gl;

繪畫頂點

if(index_array != null){// 繪畫

index_array.position(offset);//

gl.glDrawElements(mode, count, GL10.GL_UNSIGNED_SHORT, index_array);

}

else{

gl.glDrawArrays(mode, offset, count);

}

}

}

Android遊戲之2D相機

Android遊戲之2D相機

定義2D相機即設定『投影矩陣』與『視口』

『視口』用於控制輸出圖像尺寸與渲染幀緩存位置.OpenGL ES使用『視口』將投影到『近裁剪面』點座標變換為『幀緩存』像素座標

GL10.glViewport(int x,int y,int width,int height);

x和y座標為幀緩存區視口左上角.width和height為視口大小.單位為像素.幀緩存座標原點為屏幕左下角.通常將x和y設為0.width和height設為屏幕分辨率.即設為全屏.

gl.glViewport(0, 0, view.getWidth(), view.getHeight());

『投影矩陣』在2D相機中只使用『平行投影』.首先將當前矩陣設為『投影矩陣』

gl.glMatrixMode(GL10.GL_PROJECTION);

載入單位矩陣

gl.glLoadIdentity();

設置正交投影矩陣

GL10. glOrthof(int left,int right,int bottom,int top,int near,int far);

OpenGL ES座標系統正X軸指向右,正Y軸指向上.正Z軸指向我.left與right為X軸左右兩條邊.bottom與 top為Y軸上下兩條邊.near為近端裁剪面.far為遠端裁剪面.若設2D橫向相機左下角(0,0)右上角(480,320)視錐深度為2

gl.glOrthof(0,480,0,320,1, -1);

重設為模型視圖矩陣

gl.glMatrixMode(GL10.GL_MODELVIEW);

gl.glLoadIdentity();

2D相機將『觸屏』坐標轉『世界』坐標.首先設定視錐體寬為15高為10.

float frustum_width = 15;

float frustum_height = 10;

設縮放係數為1.用於放大屏幕大於1,縮小屏幕小於1

float zoom = 1;

首先將『觸屏』位置歸範圍(0~1).然後乘以視錐體寬和高

touch.x = (touch.x / view.getWidth()) * frustum_width * zoom;

因為觸屏座標原點位於屏幕左上角.需倒轉Y軸

touch.y = (1-touch.y /view.getHeight()) * frustum_height * zoom;

與相機位置相機

touch.add(position);

最後減於視錐體中心位置.得到遊戲『世界』坐標

touch.x = touch.x – frustum_width*zoom/2f;

touch.y = touch.y – frustum_height*zoom/2f;


Android遊戲之OpenGL ES

Android遊戲之OpenGL ES

OpenGL ES專為移動與嵌入設備設計之圖形編程接口. 它並非由ARB委員會定義.而是由Khronos組織定義.該組織包括ATI、NVIDIA、Intel等組成.雖然『OpenGL』與『OpenGL ES』來自兩個不同組織. 『OpenGL ES』係『OpenGL』刪減板.但你依然可寫出在兩種標準下都可運行之程式.這對於移植遊戲很重要.OpenGL ES同樣以C文檔發佈API.而代碼實現由硬件廠商完成.

如果AndroidManifest.xml中無配置glEsVersion,則表示支持OpenGL ES 1.0但所有Android系統都支持.若支持OpenGL ES 2.0需在AndroidManifest.xml中添加:

<uses-feature  android:required=”false”  android:glEsVersion=”0x00020000″ />

OpenGL ES版本號為32位整數.高16位表示OpenGL ES大版本,低16位表示OpenGL ES小版本.

required必須 簡介
true 必需支持否則不能運行
false 可選支持可能影響部分運行


OpenGL ES版本 glEsVersion
GLES 1.0 0x00010000
GLES 1.1 0x00010001
GLES 2.0 0x00020000
GLES 3.0 0x00030000
GLES 3.1 0x00030001
GLES 3.2 0x00030002


Android遊戲之紋理映射

Android遊戲之紋理映射

將『Bitmap』加載給OpenGL ES然後加載到圖形卡記憶體重,並最終交給GPU渲染.因為OpenGL最終以三角形為單位進行渲染.而將『Bitmap』映射到三角形上.需要為三角形每個頂點設定紋理座標(texture coordinates).3D座標(x,y,z)和2D座標(x,y)對應紋理座標(u,v)位圖頂點.而(u,v)座標相當於(橫,縱)座標.紋理寬與高必需是2倍數.

紋理映射 (u,v)
左上角 (0,0)
右下角 (1,1)即使寬與高不相等
右上角 (1.0)
左下角 (0,1)

生成紋理隊列,用於保存紋理ID

int[] ids = new int[1];

生成紋理並獲取id.紋理依然為空

gl.glGenTextures(1, ids,0);

紋理id

int id = ids[0];

讀取位圖

Bitmap bitmap = BITMAP.Read(file_name);

獲取位圖寬度

int   width = bitmap.getWidth();

獲取位圖高度

int   height = bitmap.getHeight();

綁定2D紋理

gl.glBindTexture(GL10.GL_TEXTURE_2D, id);

上傳2D紋理

GLUtils.texImage2D(GL10.GL_TEXTURE_2D,0,bitmap,0);

設置紋理屬性指定縮小倍數過濾器

gl.glTexParameterf(GL10.GL_TEXTURE_2D,GL10.GL_TEXTURE_MIN_FILTER,GL10.GL_NEAREST);

設置紋理屬性指定放大倍數過濾器

gl.glTexParameterf(GL10.GL_TEXTURE_2D,GL10.GL_TEXTURE_MAG_FILTER,GL10.GL_NEAREST);


過濾 簡介
GL10.GL_NEAREST 像素採樣點最接近中心點『清晰』
GL10.GL_LINEAR 像素採樣點線性插值平均加權『模糊』

取消綁定紋理ID

gl.glBindTexture(GL10.GL_TEXTURE_2D, 0);

回收位圖.以免浪費記憶體

bitmap.recycle();

每當Activity被暫停(APP切換)GLSurfaceView都會被銷毀.每當Activity恢復時調用GLSurfaceView. onResume()讓GLSurfaceView重構渲染界面.但OpenGL ES中上傳紋理都會丟失.你需要在onSurfaceCreated()中需重新載入並上傳紋理.

重新載入代碼見上文

Texture.load(filen_ame);

重新綁定紋理後設置紋理屬性

gl.glBindTexture(GL10.GL_TEXTURE_2D, id);

gl.glTexParameterf(GL10.GL_TEXTURE_2D,GL10.GL_TEXTURE_MIN_FILTER,GL10.GL_NEAREST);

gl.glTexParameterf(GL10.GL_TEXTURE_2D,GL10.GL_TEXTURE_MAG_FILTER,GL10.GL_NEAREST);

取消綁定紋理

gl.glBindTexture(GL10.GL_TEXTURE_2D, 0);


當遊戲退出.便要刪除紋理釋放記憶體.首先取消紋理邦定

gl.glBindTexture(GL10.GL_TEXTURE_2D, id);

刪除紋理

int[] ids = { id };

gl.glDeleteTextures(1,ids,0);

渲染三角形時要告知OpenGL要啟用紋理渲染

gl.glEnable(GL10.GL_TEXTURE_2D);

完成渲染後禁用紋理渲染

gl.glDisable(GL10.GL_TEXTURE_2D);

2D遊戲通常只佔用圖像一小片區域.需要將像素座標(x,y)轉換為紋理座標(u,v)

計算紋理座標左上角

u1 = x/texture.width;

v1 = y/texture.height;

計算紋理座標右下角

u2 = u1 + width/texture.width;

v2 = v1 + height/texture.height;


Android遊戲之Bitmap讀取

Android遊戲之Bitmap讀取

遊戲由『背景』與『角色』『植物』『房舍』等圖檔組成.在C時代要逐個寫圖檔分析器.而在java可以通過BitmapFactory讀取Bitmap『位圖』.幾乎支持所有常見圖檔『jpg』『png』『bmp』『png』.把所有『位圖』保存到『ASSETS』目錄下

資源管理器用於訪問『ASSETS』目錄

AssetManager asset_manager = context.getAssets();

指定『位圖名』並返回輸入流

InputStream input_stream = asset_manager.open(file_name);

讀取Bitmap默認轉換為RGB_565色

Bitmap bitamp = BitmapFactory.decodeStream(input_stream);

關閉輸入流

Input_Stream.close();

獲取位圖寬度

int width = bitmap.getWidth();

讀取位圖寬度

int height = bitmap.getHeight();

獲取位圖顏色格式.

Bitmap.Config config = bitamp.getConfig();

Bitmap.Config 位圖顏色格式
ALPHA_8 256色
ARGB_8888 32bit含ALPHA分量
RGB_565 16bit(默認)
ARGB_4444 16bit含透明度分量

以特定顏色格式進行讀取.但渲染時最終要與OpenGL ES顏色格式一致

設定顏色格式為ARGB_8888

BitmapFactory.Options options = new BitmapFactory.Options();

options.inPreferredConfig = Bitmap.Config.ARGB_8888;

指定『位圖名』並返回輸入流

InputStream Input_Stream = asset_manager.open(file_name);

讀取Bitmap並轉換為ARGB_8888色

Bitmap bitamp = BitmapFactory.decodeStream(Input_Stream, null, options);

關閉輸入流

Input_Stream.close();

OpenGL之準星

OpenGL之準星
準星紋理

射擊遊戲在屏幕中畫有『準星』用於射擊怪獸.因為『準星』固定在屏幕中心.當你移動滑鼠時.相機視角也隨之改變.而當你要移動射擊位置可通過按鍵盤上下鍵

移動滑鼠 響應 角度
左移 相機視角繞Y軸左轉 if (y >= 360.0f) y = 0.0f;
右移 相機視角繞Y軸右轉 if (y <= -360.0f) y = 0.0f;
上移 相機視角繞Z軸右轉 if (z > 60.0f) z = 60.0f;
下移 相機視角繞Z軸左轉 if (z < -60.0f) z = -60.0f;


鍵盤鍵 響應 位置與角度
上鍵 位置前移 x = x – (speed * cos(DEG_TO_RAD(y)));

z = z – (speed * sin(DEG_TO_RAD(y)));

下鍵 位置後移
左鍵 相機視角繞Y軸左轉 if (y >= 360.0f) y = 0.0f;
右鍵 相機視角繞Y軸右轉 if (y <= -360.0f) y = 0.0f;

更新相機位置與角度

1.旋轉角度 deltaTime為時間間隔

rot.x = rot.x + dx * 60 *deltaTime;

rot.y = rot.y + dy * 60 *deltaTime;

rot.z = rot.z + dz * 60 *deltaTime;

2.限制視口角度否則會上下搖恍

if ( rot.y >= 360.0f || rot.y <= -360.0f)

player->rot.y = 0.0f;

if (player->rot.z > 60.0f)

player->rot.z = 60.0f;

if (player->rot.z < -60.0f)

player->rot.z = -60.0f;

3.角度轉弧度

float radian = 3.141592654f * player->rot.y / 180.0f;

計算移動速度

4.float speed = dx * 3 *deltaTime;

5.計算位置

pos.x = (float)(pos.x – (speed * cos(radian)));

pos.z = (float)(pos.z – (speed * sin(radian)));

radian = 3.141592654f * rot.z / 180.0f; // 弧度

pos.y = (float)(pos.y – (speed * sin(radian)));

6.UVN相機模型

LookAt_Camera3D();

最後製作準星紋理

  1. 繪製白色準星
  2. 背景色填充為黑色
  3. 模色設為『索引色』256色
  4. 設定透面色為黑色glAlphaFunc(GL_GREATER, 0);