Stable Diffusion插件-AddNet融合LoRA模型

Stable Diffusion插件-AddNet融合LoRA模型

『Additional Networks』插件 簡稱AddNet.任意實時融合至多5個LoRA模型, 權重係『0~0.5』LoRA模型先發揮作用.  LoRA觸發詞要加到prompt.

https://github.com/kohya-ss/sd-webui-additional-networks

裝『Additional Networks』插件

  1. 撳『Extensions擴展』->『Install from URL網絡安裝』
  2. 『URL for extension’s git repository』填『https://github.com/kohya-ss/sd-webui-additional-networks.git』
https://github.com/kohya-ss/sd-webui-additional-networks.git
  1. 撳『Install』下載
  2. 撳『Extensions擴展』->『Installed已裝』
  3. 撳『Apply and restart UI應用後重啟界面』


指定LoRa模型資料夾路徑

  1. 撳『Settings』->『Uncategorized』->『Additional Networks』
  2. 填『Extra paths to scan for LoRA models』
C:\stable-diffusion-webui\models\Lora
  1. 撳『Apply settings』應用設定
  2. 撳『Reload UI』重啟


指定LoRa模型權重

  1. 撳『Txt2img』->『Additional Networks』
  2. 勾『Enable』使能.
  3. 撳『refresh models』
  4. 設置LoRA模型.
  5. LoRA觸發詞要加到
  6. 權重設『0~0.5』,0係禁用, 多試幾次降低權重, 修正異常.
  7. 嘗試降低『Denoising strength』重繪幅度『1~0.2』, 修正異常.

Stable Diffusion插件-AnimateDiff文生視

AnimateDiff
AnimateDiff
AnimateDiff

AnimateDif 係文本生視頻插件.

https://github.com/guoyww/AnimateDiff/

下載插件:

  1. 撳『Extensions擴展』->『Install from URL係網裝』
  2. 『URL for extension’s git repository』填『https://github.com/continue-revolution/sd-webui-animatediff.git 』
https://github.com/continue-revolution/sd-webui-animatediff.git
  1. 撳『Install』下載
  2. 撳『Extensions擴展』->『Installed已裝』
  3. 撳『Apply and restart UI應用後重啟界面』
  4. 係『txt2img』『img2img』下側『AnimateDiff』
  5. 如果出錯刪下列資料夾,在重新下載
C:\stable-diffusion-webui\extensions\sd-webui-animatediff
C:\stable-diffusion-webui\tmp\sd-webui-animatediff


連下面網址,下载AnimateDiff模型

https://huggingface.co/guoyww/animatediff/tree/main


Motion module.
mm_sd_v14.ckpt SD1.5模型
mm_sd_v15.ckpt SD1.5模型
mm_sd_v15_v2.ckpt SD1.5模型
mm_sdxl_v10_beta.ckpt SDXL模型, 增添

–disable-safe-unpickle

v3_sd15_adapter.ckpt
v3_sd15_mm.ckpt
v3_sd15_sparsectrl_rgb.ckpt
v3_sd15_sparsectrl_scribble.ckpt

將AnimateDiff模型擺係下面路徑

C:\stable-diffusion-webui\extensions\sd-webui-animatediff\model

 使sdxl模型,但animatediff加载sd1.5模型會報錯,係『Motion module』加载『mm_sdxl_v10_beta.ckpt』.

AssertionError: Motion module incompatible with SD. You are using SDXL with MotionModuleType.AnimateDiffV2.


LORA模型
v2_lora_PanLeft.ckpt 左移
v2_lora_PanRight.ckpt 右移
v2_lora_RollingAnticlockwise.ckpt 逆時針
v2_lora_RollingClockwise.ckpt 順時針
v2_lora_TiltDown.ckpt 下傾
v2_lora_TiltUp.ckpt 上傾
v2_lora_ZoomIn.ckpt 放大
v2_lora_ZoomOut.ckpt 縮細

將8个控制镜头LoRA模型擺係下面路徑

C:\stable-diffusion-webui\models\Lora


編緝『webui-user.bat』係『COMMANDLINE_ARGS』禁安全檢查,添增『–disable-safe-unpickle』

C:\stable-diffusion-webui\webui-user.bat
set COMMANDLINE_ARGS= –xformers  –disable-safe-unpickle


–disable-safe-unpickle 禁安全檢查
–no-gradio-queue


『Save format』輸出檔可楝『gif/mp4/png』, 輸出擺係下列路徑.

C:\stable-diffusion-webui\outputs\txt2img-images\AnimateDiff
C:\stable-diffusion-webui\outputs\img2img-images\AnimateDiff


勾『Enable AnimateDiff』激活, 吾係冇郁.

『Number of frames』總格量.

『FPS』每秒幾格, 默認8.

Number of frames/ FPS=Duration時長

『Display Loop number』默認0.循環放带.

『Context batch size』批處理規模.

SD1.5 16
SDXL 8

『Closed loop』閉環

N 首尾格吾同
R-P 閉環首尾格一致,尾4格漸變
R+P 閉環首尾格一致,尾12格漸變
A 閉環首尾格一致, 關䭈格至尾格漸變

『STRIDE』運動步幅, 默認1, 以1^2

STRIDE 步幅
1 [0, 1, 2, 3, 4, 5, 6, 7]
2 [0, 2, 4, 6], [1, 3, 5, 7]
4 [0, 4], [1, 5], [2, 6], [3, 7]


『Overlap』重叠, 默認-1, 即『Context batch size/4』, 改為


『Frame Interpolation』格與格之間插值平滑動畫.用Deforum插件插值.

Off 閂插值
FILM 激活插值, 按照Interp X插入動畫格

『Interp X』控制動畫平滑度,默認10.每1個原始格增加10格. 『Number of frames * Interp X』

激活『FILM』後, 總格量增大, 降低『FPS』控制動畫播放速度


下載Deforum插件:

https://github.com/deforum-art/deforum-for-automatic1111-webui.git


當咒詞過長, 會彈出『TORCH_USE_CUDA_DSA』.使舊版本animatediff『sd-webui-animatediff-1.13.1.zip』.

RuntimeError: CUDA error: device-side assert triggered

CUDA kernel errors might be asynchronously reported at some other API call, so the stacktrace below might be incorrect.

For debugging consider passing CUDA_LAUNCH_BLOCKING=1.

Compile with `TORCH_USE_CUDA_DSA` to enable device-side assertions.

RuntimeError: CUDA error: device-side assert triggered

Compile with `TORCH_USE_CUDA_DSA` to enable device-side assertions.


checkpoint BoleromixSD_v10.safetensors
vae vaeFtMse840000EmaPruned_vaeFtMse840k.safetensors
Sampling method采樣法 DPM++ 2M Karras
Sampling steps 20
Width*height 512*512
CFC scale提示詞關連 7
seed随機數 1676223524
Enable AnimateDiff 使能
Motion module mm_sd_v15_v2.ckpt
Save format格式 GIF
Number of frames 8
FPS 8
Display loop number 0
Context batch size 16
Stride 1
Overlap重疊 0
Closed loop 閉環A
Frame Interpolation FILM 插值
Interp X 10


Stable Diffusion插件-TiledDiffusion分區放大

Stable Diffusion插件-TiledDiffusion分區放大

TiledDiffusion分區放大插件.將圖像自動分割細块,再𢴇行放大算放.降低顯存消耗,再将細塊重組為圖像.一氣呵成冇人工幹預.

https://github.com/pkuliyi2015/multidiffusion-upscaler-for-automatic1111

下載插件:

  1. 撳『Extensions擴展』->『Install from URL係網裝』
  2. 『URL for extension’s git repository』填『https://github.com/pkuliyi2015/multidiffusion-upscaler-for-automatic1111.git』
https://github.com/pkuliyi2015/multidiffusion-upscaler-for-automatic1111.git
  1. 撳『Install』下載
  2. 撳『Extensions擴展』->『Installed已裝』
  3. 撳『Apply and restart UI應用後重啟界面』
  4. 係『txt2img』『img2img』下側『Tiled Diffusion』
  5. 如果出錯刪下列資料夾,在重新下載
C:\stable-diffusion-webui\extensions\multidiffusion-upscaler-for-automatic1111
C:\stable-diffusion-webui\tmp\multidiffusion-upscaler-for-automatic1111

『Model』揀『boleromix_v10.safetensors』

『VAE』揀『vae-ft-mse-840000-ema-pruned.safetensors』

『Width/height』寛高填『800*500』

『upscaler』放大算放『4x-UltraSharp』

『upscale by』放大倍 2,此值要大於1放大算放先𢴇行.


勾『Tiled Diffusion』激活

『Method』平鋪算法揀『MultiDiffusion』

MultiDiffusion 重繪
Mixture of Diffusers 放大

『Latent tile width/ Latent tile height』細塊像素寛高默認96.最大128.值越大,效果好速度高.

『Latent Tile Overlap』細塊與細塊之間重叠像素.默認48.數值大,間隙細速度慢.

MultiDiffusion 32/48
Mixture of Diffusers 16/32

『Latent Tile batch size』批處理規模.默認4.顯存大值高速快.顯存細反而拖慢.


Stable Diffusion插件-Adetailer修復臉形扭曲

Stable Diffusion插件-Adetailer修復臉形扭曲

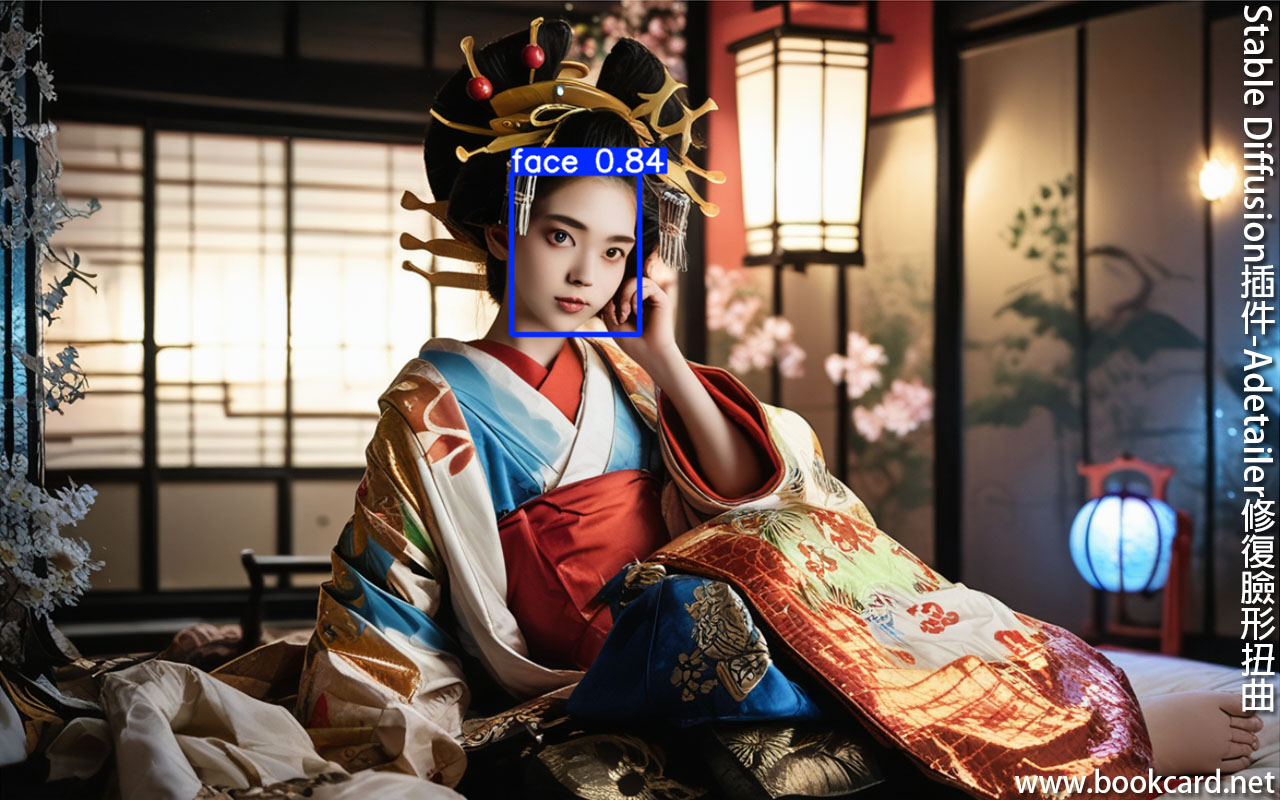
Adetailer自動檢測人臉,針對人臉自動生成遮罩,自動重繪修復臉形扭曲.一氣呵成, 吾使人工幹預.

https://github.com/Bing-su/adetailer
  1. 撳『Extensions擴展』->『Install from URL網絡安裝』
  2. 『URL for extension’s git repository』填『https://github.com/Mikubill/sd-webui-controlnet
https://github.com/Bing-su/adetailer.git
  1. 撳『Install』下載
  2. 撳『Extensions擴展』->『Installed已裝』
  3. 撳『Apply and restart UI應用後重啟界面』


  1. 手動下載『adetailer』
  2. 登入CMD命令行模式
  3. 指定當前資料夾
CD C:\stable-diffusion-webui\extensions\
  1. 下載『adetailer
git clone https://github.com/Bing-su/adetailer.git
  1. 如出錯刪下列檔䅁夾,再重新下載
C:\stable-diffusion-webui\extensions\sd-webui-animatediff
C:\stable-diffusion-webui\tmp\sd-webui-animatediff


勾ADetailer激活

揀Detection model检测模型,8s比8n說耗時長,修圖效果更佳.

Detection model检测模型  
Face_yolov8n.pt 檢測重繪人面
Face_yolov8s.pt 檢測重繪人面
Hand_yolov8n.pt 檢測重繪手
Person_yolov8n-seg.pt 檢測重繪整個人
Person_yolov8s-seg.pt 檢測重繪整個人
Yolov8x-worldv2.pt  
Mediapipe_face_full 檢測重繪人臉
Mediapipe_face_short  
mediapipe_face_mesh  
mediapipe_face_eyes_only 檢測重繪人眼

通過1st,2nd,3rd,4th, 叠加多個模型檢測并重繪


Stable Diffusion嵌入文本

Stable Diffusion嵌入文本

生成手執標誌牌女仔. 之後嵌入文本.

  1. 模型揀『safetensors』
  2. 撳『txt2img』文生圖
  3. 加入咒詞『holding sign』持有標誌
  4. 係咒詞加入lora模型『need_buzz_sign』.
  5. 設『width寛』=1280,『height高』=800.
  6. VAE揀『safetensors』
  7. 擦除標誌牌字.
  8. 再寫字.


prompt 咒詞
20yo, 20歲
score_9,  
score_8_up,  
score_7_up,  
shiny oild skin, 油亮皮膚
sweat, 汗水
upper_body, 上身
Pencil_skirt, 短笔裙
Miniskirt, 迷理裙
Office_lady, 文秘
Japan_girl,  
need_buzz,  
holding sign, 持有標誌
intricate detail, 錯綜複雜細節
\nworking, n工作
boss, 老細
super, 超級
office casual, 辦公室休閒裝
delicate patterns, 精緻圖案
black hair 黑髮
Long hair, 長髮
ban, 禁令
large breasts, 大波
nindoor,  
room,
interior, 室內
lights,
\n(makeup, blush, shameful) 化妝、臉紅、丟臉
looking at viewer, 著觀眾
brown eyes, 棕眼
turn up eyes, 抬起眼睛
(open mouth:0.6), 張嘴
\n(best quality, masterpiece, intricate detail, beautiful artwork), 最好質量、傑作、精緻細節、美麗藝術品
<lora:need_buzz_sign:0.95>  


反向咒詞  
zPDXL2,  
(man:2),  


Stable-Diffusion-ebsynth-utility短片轉動畫

Stable Diffusion-ebsynth utility下載安裝
EbSynth生成過渡幀
EbSynth生成過渡幀
transparent-background遮罩
FFmpeg BIN設定指南
FFmpeg BIN設定指南

ebsynth-utility短片轉動畫,係開工之前,需准备架餐.

  1. EbSynth
  2. Ebsynth_Utility
  3. FFmpeg BIN設定指南
  4. transparent-background遮罩
  5. 首先建立工程project資料夾, 以『a~z/A~Z』起名,『吉格』以『-』替换.
Z:\Bookcard\Stable-Diffusion-ebsynth-utility\input
Z:\Bookcard\Stable-Diffusion-ebsynth-utility\output
  1. 係input下擺影片
Z:\Bookcard\Stable-Diffusion-ebsynth-utility\input\model.mp4
  1. 著『stable diffusion webui』


  1. 撳『Ebsynth Utility』->『stage1』分幀同埋遮罩
  2. 『Project directory』工程資料夾路徑,吉資料夾.
Z:\Bookcard\Stable-Diffusion-ebsynth-utility\output
  1. 『Original Movie Path』填影片路徑
Z:\Bookcard\Stable-Diffusion-ebsynth-utility\input\model.mp4
  1. 撳『Configuration』->『stage1』
  2. 『Frame Width』『Frame Height』填『-1』,與影片寬高臺致.
  3. 『Mask Threshold』遮罩閾值『0~0.1』ࣿ
  4. 撳『Generate』生成『video_frame』分幀『video_mask』遮罩.
  5. 『video_frame』分幀
Z:\Bookcard\Stable-Diffusion-ebsynth-utility\output\video_frame
  1. 『video_mask』輸出幀遮罩
Z:\Bookcard\Stable-Diffusion-ebsynth-utility\output\video_mask


  1. 撳『Ebsynth Utility』->『stage2』生成關鍵幀
  2. 撳『Configuration』->『stage2』
  3. 『Minimum keyframe gap』最细關鍵幀間隔,默認
  4. 『Maximum keyframe gap』最大關鍵幀間隔,默認
  5. 『Threshold of delta frame edge』幀邊緣檢測閾值. 默認5
  6. 撳『Generate』复制關鍵幀『video_key』
Z:\Bookcard\Stable-Diffusion-ebsynth-utility\output\video_key


  1. 撳『Ebsynth Utility』->『stage3』轉二元.
  2. 『Stable Diffusion checkpoint』揀貳次元模型『safetensors』
  3. 撳『img2img』
  4. 『prompt』咒詞
Masterpiece,Ultra high res,High quality,4k,(Photorealistic:1.2),Photo,Miniskirt,Breasts,large breasts,Navel,Lace,
  1. 『Negative prompt』反向咒詞
(worst quality:2), (low quality:2), (normal quality:2),lowres,((monochrome)),((grayscale)), (monochrome), skin spots, acnes, skin blemishes, age spot, glans,extra limbs,extra arms,extra legs,extra leg,extra foot,extra fingers,fewer fingers,strange fingers,missing arms,missing legs,missing fingers,fused fingers,too many fingers,bad hand,(bad_prompt:0.8), bad anatomy,bad hands, bad feet,bad body,bad proportions,gross proportions,DeepNegative,(fat:1.2),looking away,tilted head,{Multiple people},text,error,extra digit,fewer digits,cropped,jpeg artifacts,signature,watermark,username,blurry,cropped,poorly drawn hands,poorly drawn face,mutation,deformed,malformed limbs,long neck,cross-eyed,mutated hands,polar lowres,
  1. 『Resize by』->『WIDTH』『HEIGHT』與原片寛高壹致.
  2. 『Denoising strength重绘幅度』值細於『5』值越細圖像與原圖越似.
  3. 『SEED』随機種子.随意填固定值,例『123』.
  4. 係『script脚本』揀『ebsynth utility』
  5. 係『Project directory』填工程路徑.
Z:\Bookcard\Stable-Diffusion-ebsynth-utility\output
  1. 係『Mask option (Override img2img Mask mode)』遮罩揀『Normal』
  2. 係『Inpaint Area(Override img2img Inpaint area)』揀『Only masked』僅重繪遮罩.
  3. 『Control Net Weight』权重『5』
  4. 『Control Net Weight For Face』face权重『5』
  5. 勾『Use Preprocess image If exists in /controlnet_preprocess』
  6. 撳『Settings』->『ControlNet』 .
  7. 勾『Allow other script to control this extension』允许 ControlNet 畀其它脚本调用.
  8. 『Apply settings』應用設定.
  9. 撳『img2img』->『Generate』生成『controlnet_input』同埋『img2img_key』
Z:\Bookcard\Stable-Diffusion-ebsynth-utility\output\img2img_key


  1. 撳『Ebsynth Utility』->『5』校色
  2. 撳『Color Transfer Method』揀『default』
  3. 撳『Color Matcher Ref Image Type』揀『original video frame』
  4. 撳『Generate』生成撳『st3_5_backup_img2img_key』


  1. 撳『Ebsynth Utility』->『stage4』放大關鍵幀
  2. 撳『Settings』->『Saving images/grids』
  3. 勾『Use original name for output filename during batch process in extras tab』. 原始名稱作為輸出檔名
  4. 撳『Apply settings』應用設定.
  5. 撳『extrans』->『Batch from Directory』從資料㚒批次處理
  6. 『Input directory』輸入資料㚒
Z:\Bookcard\Stable-Diffusion-ebsynth-utility\output\img2img_key
  1. 『Output directory』輸出資料㚒
Z:\Bookcard\Stable-Diffusion-ebsynth-utility\output\img2img_upscale_key
  1. 『Upscaler1』揀『4x-UltraSharp』
  2. 『Scale By』揀『1』
  3. 撳『extrans』->『Generate』生成『img2img_upscale_key』放大關鍵幀.


  1. 撳『Ebsynth Utility』->『stage5』生成ebs文檔.
  2. 撳『Generate』生成ebs文檔.
Z:\Bookcard\Stable-Diffusion-ebsynth-utility\xxxxx.ebs


  1. 撳『Ebsynth Utility』->『stage6』生成過度幀.
  2. 著『Ebsynth』載入『ebs』,頁眉顯示當前EBS檔名.
  3. 撳『Run All』生成『out』
  4. Ebsynth 過渡幀狀態變成 Synth後,依次載入『ebs』『00002.ebs』『00003.ebs』…重复上述两步.
Z:\Bookcard\Stable-Diffusion-ebsynth-utility\out-…


  1. 撳『Ebsynth Utility』->『stage7』合成短片.
  2. 『Crossfade blend rate』速率填
  3. 『Export type』可揀『mp4』『webm』『gif』『rawvideo』.
  4. 撳『Generate』生成两條片壹條有聲壹條冇聲.


  1. 撳『Ebsynth Utility』->『stage8』替換背景.
  2. 『Background source』背景可揀『圖』或『短片』
  3. 『Background type』可揀『Fit video length』或『LOOP』


正面咒詞
Masterpiece, 傑作
Ultra high res, 超高解像
High quality, 高品質
4k, 4k
(Photorealistic:1.2), 真實感
Photo, 相片
Miniskirt, 迷你裙
Breasts, 胸部
large breasts, 大乳
Navel, 肚臍
Lace, 蕾絲
WHITE LACE, 白色蕾絲
a girl with Tulle skirt, 薄紗裙
a girl with Lace blouse, 蕾絲襯衫


反向咒語Negative Prompt 簡述
(worst quality:2), 低質內容
(low quality:2), 低質內容
(normal quality:2), 低質內容
lowres, 低質內容
((monochrome)), 黑白
((grayscale)), 灰階
(monochrome), 單色
skin spots, 皮膚斑點
acnes, 痤瘡
skin blemishes, 皮膚瑕疵
age spot, 老人斑
glans, 龜頭
extra limbs, 多餘肢體
extra arms, 額外武器
extra legs, 多餘腳瓜瓤
extra leg, 多餘腳瓜瓤,
extra foot, 多餘腳掌
extra fingers, 手指太多
fewer fingers, 手指更少
strange fingers, 怪手指
missing arms, 缺手瓜
missing legs, 缺腳瓜瓤
missing fingers, 缺手指
fused fingers, 融合手指
too many fingers, 手指太多
bad hand, 歪手
(bad_prompt:0.8), 不良提示
bad anatomy, 解剖不良
bad hands, 歪手
bad feet,
bad body, 歪身歪勢,
bad proportions, 身體比例差,
gross proportions, 總比例
DeepNegative, 深度負面
(fat:1.2), 脂肪
looking away, 睇向別處
tilted head, 側頭
{Multiple people}, 多人
text, 文字
error, 錯字
extra digit, 額外數字
fewer digits, 細數
cropped, 裁剪
jpeg artifacts, 壓縮痕跡
signature, 簽名
watermark, 水印
username, 身份
blurry, 模糊
cropped, 裁剪
poorly drawn hands, 手畫得吾靚
poorly drawn face, 樣畫得吾靚
mutation, 突變
deformed, 變形
malformed limbs, 肢體畸形
long neck, 長頸
cross-eyed, 鬥雞眼
mutated hands, 手型變異
polar lowres, 極地低氣壓


Stable Diffusion-ebsynth utility下載安裝

Stable Diffusion-ebsynth utility下載安裝

Ebsynth Utility係Ebsynth 配套『Stable Diffusion』插件. 將短片分割幀,利用貳次元模型進行風格轉换.

https://github.com/s9roll7/ebsynth_utility.git

下載插件:

  1. 撳『Extensions擴展』->『Install from URL係網裝』
  2. 『URL for extension’s git repository』填『https://github.com/Mikubill/sd-webui-controlnet
https://github.com/Mikubill/sd-webui-controlnet.git
  1. 撳『Install』下載
  2. 撳『Extensions擴展』->『Installed已裝』
  3. 撳『Apply and restart UI應用後重啟界面』
  4. 係『txt2img』『img2img』下側『ControlNet』
  5. 如果出錯刪下列資料夾,在重新下載
C:\stable-diffusion-webui\extensions\ebsynth_utility
C:\stable-diffusion-webui\tmp\ebsynth_utility


transparent-background遮罩

transparent-background遮罩

transparent-background』自動分離人像同背景,再生成遮罩,冇需人手干預.

https://github.com/plemeri/transparent-background

登入『命令行模式CMD』, 進入資料夾Python.

CD C:\Program Files\Python310\

下載安裝『transparent-background』1.3.2版,

python.exe -m pip install transparent-background==1.3.2

裝1.3.3版係產生’fast’錯設

remover = Remover(fast=tb_use_fast_mode, jit=tb_use_jit, device=devices.get_optimal_device_name())
TypeError: Remover.init() got an unexpected keyword argument ‘fast’

卸裝『transparent-background』

pip uninstall transparent-background

可能需要更新python

python.exe -m pip install –upgrade pip

顯列python安装包及版本號.

Pip list

下載模型『ckpt_base.pth』『ckpt_fast.pth』『ckpt_base_nightly.pth

https://github.com/plemeri/transparent-background/releases/tag/1.2.12
https://github.com/plemeri/transparent-background/releases/download/1.2.12/ckpt_base.pth
https://github.com/plemeri/transparent-background/releases/download/1.2.12/ckpt_fast.pth
https://github.com/plemeri/transparent-background/releases/download/1.2.12/ckpt_base_nightly.pth

下載後擺係『C:\Users\user.transparent-background』

佢有圖形版『transparent-background-gui.exe』壹建生成遮罩.

C:\Program Files\Python310\Scripts\transparent-background-gui.exe
  1. 撳『open file』載入圖檔.
  2. 勾『reverse』反轉遮罩.
  3. 撳『process』生成遮罩.


如果『pydantic』報錯可先卸载後重装

ImportError: cannot import name ‘ValidationInfo’ from ‘pydantic’ (C:\Users\bookc\AppData\Roaming\Python\Python310\site-packages\pydantic\__init__.cp310-win_amd64.pyd)

先卸载『pydantic』

python.exe -m pip uninstall pydantic

後重装『pydantic』

python.exe -m pip install pydantic==1.8.1


FFmpeg BIN設定指南

FFmpeg BIN設定指南
FFmpeg BIN設定指南
  1. 登錄錄官網FFmpeg
https://ffmpeg.org/download.html
  1. 撳『Windows』
  2. 撳『Windows Builds by Btbn』
  3. 下載『ffmpeg-master-latest-win64-gpl.zip
https://github.com/BtbN/FFmpeg-Builds/releases/download/latest/ffmpeg-master-latest-win64-gpl.zip
  1. 解壓後擺係C碟,下有bin資料夾.
C:\ffmpeg-master-latest-win64-gpl\bin

三大神器

ffmpeg.exe 音影轉碼
ffplay.exe 播放機
ffprobe.exe 多媒体码流分析


添增環境路徑.

  1. 撳『win+Pause break』鍵
  2. 撳『進階系統設定』
  3. 撳『環境變數』
  4. 係『系統變數』->編輯『Path』->撳『新增』.
C:\ffmpeg-master-latest-win64-gpl\bin


Stable Diffusion顯卡吾支持半精度浮點數

『nvidia 2080ti』吾支持半精度類型, 早知買『nvidia 3090ti』

   modules.devices.NansException: A tensor with NaNs was produced in Unet. This could be either because there’s not enough precision to represent the picture, or because your video card does not support half type. Try setting the “Upcast cross attention layer to float32” option in Settings > Stable Diffusion or using the –no-half commandline argument to fix this. Use –disable-nan-check commandline argument to disable this check.
A tensor with all NaNs was produced in VAE.

Web UI will now convert VAE into 32-bit float and retry.

To disable this behavior, disable the ‘Automatically revert VAE to 32-bit floats’ setting.

To always start with 32-bit VAE, use –no-half-vae commandline flag.

  1. 𢴇行『webui-user.bat』著『Stable Diffusion webui』
  2. 撳『Settings』->『Stable Diffusion』
  3. 勾『Upcast cross attention layer to float32』
  4. 撳『Apply settings』應用設定
  5. 撳『Reload UI』重啟界面


另壹條橋係加入命令行參數

  1. 編緝『C:\stable-diffusion-webui\webui-user.bat』
  2. 係命令行參數『COMMANDLINE_ARGS』加入『–no-half』冇半精度類型, -『-no-half-vae』『–disable-nan-check』禁nan檢驗.
webui-user.bat
set COMMANDLINE_ARGS= –no-half  –no-half-vae  –disable-nan-check


–no-half-vae 吾將VAE模型切換成16bit浮點數
–no-half 吾將模型切換成16bit浮點數
–disable-nan-check 吾檢查生成圖像潛在空間是否包含nan值,係持續集成中運行時無需檢查點


Stable Diffusion-Openpose

Stable Diffusion-Openpose

『Openpose』直接控制姿势同埋表情.對人像動作控制大大提升.

首先獲得骨架姿勢『pose.json』

  1. 撳『txt2img』
  2. 撳『ControlNet Unit 0』
  3. 『Control Type』揀『OpenPose』
  4. 係『image』上傳人像圖.
  5. 『Preprocessor』揀『dw_openpose_full』獲得姿势表情.小量人像圖揀『openpose_full』.
  6. 『Model』揀『kohya_controllllite_xl_openpose_anime_v2 [b0fa10bb] 』
  7. 勾『Enable』使能.
  8. 勾『Pixel Perfect』像數完美
  9. 勾『Allow Preview』 允許預覽
  10. 撳『JSON』下載骨架姿勢『json』


依據骨架生成圖畫.

  1. 『Stable Diffusion checkpoint』揀『safetensors』或『waiREALMIX_v100.safetensors』
  2. 撳『txt2img文生圖』
  3. 填『正向咒語Prompt』
  4. 填『反向咒語Negative Prompt』
  5. 『Sampling method』揀『DPM++ 2S a』.
  6. 『Sampling steps 』填
  7. 『Width』填1600,『height』填
  8. 撳『ControlNet Unit 0』
  9. 『Control Type』揀『OpenPose』
  10. 勾『Enable』使能.
  11. 勾『Pixel Perfect』像數完美.
  12. 勾『Allow Preview』允許預覽.
  13. 撳『Upload JSON』上傳骨架姿勢『json』.
  14. 『Preprocessor』揀『dw_openpose_full』.
  15. 『Model』揀『thibaud_xl_openpose』.
  16. 『Control mode』揀『balanced平衡』.
  17. 撳『Generation』生成


正向咒語Prompt 簡述
1girl, 1女
solo, 獨奏
long hair, 長髮
breasts, 乳房
towel, 毛巾
cleavage, 卵裂
very long hair, 很長頭髮
naked towel, 裸毛巾
brown eyes, 棕色眼睛
large breasts, 大乳
hair between eyes, 眼睛之間頭髮
upper body, 上身
looking at viewer, 看著觀眾
bangs, 劉海
bare shoulders, 裸肩
tile wall, 瓷磚牆
collarbone, 鎖骨
brown hair, 棕髮
indoors, 室內
parted lips, 張開嘴唇
ahoge,


反向咒語Negative Prompt 簡述
(worst quality:2), 低質內容
(low quality:2), 低質內容
(normal quality:2), 低質內容
lowres, 低質內容
((monochrome)), 黑白
((grayscale)), 灰階
(monochrome), 單色
skin spots, 皮膚斑點
acnes, 痤瘡
skin blemishes, 皮膚瑕疵
age spot, 老人斑
glans, 龜頭
extra limbs, 多餘肢體
extra arms, 額外武器
extra legs, 多餘腳瓜瓤
extra leg, 多餘腳瓜瓤,
extra foot, 多餘腳掌
extra fingers, 手指太多
fewer fingers, 手指更少
strange fingers, 怪手指
missing arms, 缺手瓜
missing legs, 缺腳瓜瓤
missing fingers, 缺手指
fused fingers, 融合手指
too many fingers, 手指太多
bad hand, 歪手
(bad_prompt:0.8), 不良提示
bad anatomy, 解剖不良
bad hands, 歪手
bad feet,
bad body, 歪身歪勢,
bad proportions, 身體比例差,
gross proportions, 總比例
DeepNegative, 深度負面
(fat:1.2), 脂肪
looking away, 睇向別處
tilted head, 側頭
{Multiple people}, 多人
text, 文字
error, 錯字
extra digit, 額外數字
fewer digits, 細數
cropped, 裁剪
jpeg artifacts, 壓縮痕跡
signature, 簽名
watermark, 水印
username, 身份
blurry, 模糊
cropped, 裁剪
poorly drawn hands, 手畫得吾靚
poorly drawn face, 樣畫得吾靚
mutation, 突變
deformed, 變形
malformed limbs, 肢體畸形
long neck, 長頸
cross-eyed, 鬥雞眼
mutated hands, 手型變異
polar lowres, 極地低氣壓


https://github.com/huchenlei/sd-webui-openpose-editor.git


Stable Diffusion動畫轉真人

Stable Diffusion動畫轉真人

『Stable Diffusion』真人改動畫, 重點係揀適合模型,同埋設較細重绘幅度.

  1. 撳『Tagger』反推咒語引導生圖.
  2. 『Stable Diffusion checkpoint』模型揀『safetensors』.
  3. 撳『img2img文生圖』.
  4. 撳『Generation』->『img2img』
  5. 係『IMAGE』拖入動畫.
  6. 『Resize mode』揀『Resize and fill』.
  7. 『Sampling method采樣法』揀『DPM++ 2S a』.
  8. 『Sampling steps采樣步』填『32』.
  9. 『Resize BY』->『SCALE缩放』填 與原圖大細壹致.
  10. 『Denoising strength重绘幅度』填『0.52』,值越細圖像與原圖越似.
  11. 撳『ControlNet unit0』
  12. 勾『Enable使能』
  13. 勾『Pixel Perfect』像數完美
  14. 勾『Allow Preview』允許預覽
  15. 勾『Upload independent control image』上傳獨立控制影像
  16. 揀『Single image』拖入動畫.
  17. 『Control Type』揀『openpose』
  18. 『Preprocessor』揀『dw_openpose_full』
  19. 『mode』揀『t2i_adapter_diffusers_xl_openpose』,openpose模型須與基礎模型相配.
  20. 『Control mode』揀『balanced平衡』
  21. 『Resize mode』揀『Resize and fill』.
  22. 撳『Generate』生成影像.


正向咒語Prompt 簡述
1girl, 1女
solo, 獨奏
long hair, 長髮
breasts, 乳房
towel, 毛巾
cleavage, 卵裂
very long hair, 很長頭髮
naked towel, 裸毛巾
brown eyes, 棕色眼睛
large breasts, 大乳
hair between eyes, 眼睛之間頭髮
upper body, 上身
looking at viewer, 看著觀眾
bangs, 劉海
bare shoulders, 裸肩
tile wall, 瓷磚牆
collarbone, 鎖骨
brown hair, 棕髮
indoors, 室內
parted lips, 張開嘴唇
ahoge,


反向咒語Negative Prompt 簡述
(worst quality:2), 低質內容
(low quality:2), 低質內容
(normal quality:2), 低質內容
lowres, 低質內容
((monochrome)), 黑白
((grayscale)), 灰階
(monochrome), 單色
skin spots, 皮膚斑點
acnes, 痤瘡
skin blemishes, 皮膚瑕疵
age spot, 老人斑
glans, 龜頭
extra limbs, 多餘肢體
extra arms, 額外武器
extra legs, 多餘腳瓜瓤
extra leg, 多餘腳瓜瓤,
extra foot, 多餘腳掌
extra fingers, 手指太多
fewer fingers, 手指更少
strange fingers, 怪手指
missing arms, 缺手瓜
missing legs, 缺腳瓜瓤
missing fingers, 缺手指
fused fingers, 融合手指
too many fingers, 手指太多
bad hand, 歪手
(bad_prompt:0.8), 不良提示
bad anatomy, 解剖不良
bad hands, 歪手
bad feet,
bad body, 歪身歪勢,
bad proportions, 身體比例差,
gross proportions, 總比例
DeepNegative, 深度負面
(fat:1.2), 脂肪
looking away, 睇向別處
tilted head, 側頭
{Multiple people}, 多人
text, 文字
error, 錯字
extra digit, 額外數字
fewer digits, 細數
cropped, 裁剪
jpeg artifacts, 壓縮痕跡
signature, 簽名
watermark, 水印
username, 身份
blurry, 模糊
cropped, 裁剪
poorly drawn hands, 手畫得吾靚
poorly drawn face, 樣畫得吾靚
mutation, 突變
deformed, 變形
malformed limbs, 肢體畸形
long neck, 長頸
cross-eyed, 鬥雞眼
mutated hands, 手型變異
polar lowres, 極地低氣壓


Stable Diffusion-升级XL模型

继『Stable Diffusion 2.1』後推出『Stable Diffusion XL1.0』升级版,分三版『Base』『refiner』『turbo』.適用於『AUTOMATIC1111』

https://huggingface.co/stabilityai?search_models=xl


下載 XL 模型

https://huggingface.co/stabilityai/stable-diffusion-xl-base-1.0/resolve/main/sd_xl_base_1.0.safetensors?download=true
https://huggingface.co/stabilityai/stable-diffusion-xl-base-1.0/resolve/main/sd_xl_base_1.0_0.9vae.safetensors?download=true
https://huggingface.co/stabilityai/stable-diffusion-xl-refiner-1.0/resolve/main/sd_xl_refiner_1.0.safetensors?download=true
https://huggingface.co/stabilityai/stable-diffusion-xl-refiner-1.0/resolve/main/sd_xl_refiner_1.0_0.9vae.safetensors?download=true
https://huggingface.co/stabilityai/sdxl-turbo/resolve/main/sd_xl_turbo_1.0.safetensors?download=true
https://huggingface.co/stabilityai/sdxl-turbo/resolve/main/sd_xl_turbo_1.0_fp16.safetensors?download=true

擺係

C:\stable-diffusion-webui\models\Stable-diffusion


下載VAE模型

https://huggingface.co/stabilityai/sdxl-vae/resolve/main/sdxl_vae.safetensors?download=true

擺係

C:\stable-diffusion-webui\models\VAE


下載LORA模型

https://huggingface.co/stabilityai/stable-diffusion-xl-base-1.0/resolve/main/sd_xl_offset_example-lora_1.0.safetensors?download=true

擺係

C:\stable-diffusion-webui\models\Lora


SDXL 1.0 模型 簡述
sd_xl_base_1.0.safetensors base模型
sd_xl_base_1.0_0.9vae.safetensors base模型內置 VAE
sd_xl_refiner_1.0.safetensors refiner模型
sd_xl_refiner_1.0_0.9vae.safetensors refiner模型內置 VAE
sd_xl_turbo_1.0.safetensors turbo模型
sd_xl_turbo_1.0_fp16.safetensors turbo模型內置 VAE
sdxl_vae.safetensors 外置VAE模型
sd_xl_offset_example-lora_1.0.safetensors lora模型


網埞址 版本
https://huggingface.co/stabilityai?search_models=xl XL
https://huggingface.co/stabilityai/stable-diffusion-xl-base-1.0 base
https://huggingface.co/stabilityai/stable-diffusion-xl-refiner-1.0 refiner
https://huggingface.co/stabilityai/sdxl-turbo turbo
https://huggingface.co/ByteDance/SDXL-Lightning Lightning
https://huggingface.co/stabilityai/sdxl-vae VAE

Nvidia-2080ti吾支持float16精度,彈出警示.

A tensor with all NaNs was produced in VAE.

Web UI will now convert VAE into 32-bit float and retry.

To disable this behavior, disable the ‘Automatically revert VAE to 32-bit floats’ setting.

To always start with 32-bit VAE, use –no-half-vae commandline flag.

  1. 直接编緝『C:\stable-diffusion-webui\webui-user.bat』.
  2. 係『COMMANDLINE_ARGS』命令行参數加入『–no-half-vae』吾將VAE模型轉換為float-16bit半精度.
webui-user.bat
set COMMANDLINE_ARGS= –no-half-vae


–no-half-vae 吾將VAE模型轉換為float-16bit半精度
–no-half 吾將模型轉換為float-16bit半精度
–disable-nan-check 吾檢查生成圖像/潛在空間是否包含nan值,在持續集成中運行時無需檢查點


正咒詞
looking at viewer, 睇著觀眾
making eye contact, 眼神交流
a girl with Tulle skirt, 薄紗裙
a girl with Lace blouse, 蕾絲襯衫
a girl Sequin dress, 亮片裙
Volumetric Lighting, 體積照明
light depth, 光深度
flower
beautiful lighting,
Double Exposure Style, 雙重曝光風格
Traditional Attire, 傳統服飾
Artistic Calligraphy and Ink, 書法與水墨藝術
dramatic atmospheric lighting, 戲劇氛圍照明
Volumetric Lighting, 體積照明
double image ghost effect, 雙影像重影效果
image combination, 影像組合
double exposure style, 雙重曝光風格
1girl, 1女孩,
solo, 獨奏,
long hair, 長髮
breasts, 乳房
towel, 毛巾
cleavage, 卵裂
very long hair, 長髮
naked towel, 裸毛巾
brown eyes, 棕眼
large breasts, 大乳房
hair between eyes, 眼睛之間頭髮
upper body, 上身
looking at viewer, 看著觀眾
bangs, 劉海
bare shoulders, 裸露肩膀
collarbone, 鎖骨
brown hair, 棕髮
indoors, 室內
parted lips, 張開嘴唇


反咒詞
ugly, 醜陋
deformed, 變形
noisy, 嘈雜
blurry, 模糊
low contrast, 低對比度


Stable Diffusion-放大算法4x-UltraSharp

Stable Diffusion-放大算法4x-UltraSharp

『4x-UltraSharp』比『R-ESRGAN General 4xV3』放大效果仲清晰.冇損逼真放大.

  1. 下載『4x-UltraSharp』
https://huggingface.co/lokCX/4x-Ultrasharp/resolve/main/4x-UltraSharp.pth?download=true
https://huggingface.co/lokCX/4x-Ultrasharp/tree/main
  1. 擺係
C:\stable-diffusion-webui\models\ESRGAN
  1. 撳『Settings』->『Face restoration』.
  2. 禁『Restore faces面部修复』.
  3. 撳『Settings』->『user interface』.
  4. 係『Quicksettings list』加入『upacler_for_img2img』係頁頂快速設定放大算法.
  5. 撳『Apply settings』應用設定.
  6. 撳『Reload UI』重啟界面.
  7. 係頁頂『Upscaler for img2img』揀『4x-UltraSharp』.
  8. 撳『img2img』->『Generation』->『img2img』
  9. 拖入低解像圖畫
  10. 係『Resize by』->『Scale缩放』設『4』,如果記憶體溢出降低放大值.
  11. 係『Denoising strength』設值『1』
  12. 撳『Generate』放大圖畫.

Stable Diffusion-模型VAE

Stable Diffusion-模型VAE

VAE模型用於修正圖畫色彩,『none冇』VAE模型色彩平淡,指定VAE模型後色彩鮮豔,光影分明.

VAE模型擺係

C:\stable-diffusion-webui\models\VAE

係『Stable Diffusion WEBUI』頁頂添加快速設定清單.

  1. 撳『Settings』->『User interface』
[info] Quicksettings list (setting entries that appear at the top of page rather than in settings tab) (requires Reload UI)
  1. 添加『sd_vae』
sd_model_checkpoint   sd_vae
  1. 撳『Apply settings』應用設定.
  2. 撳『Reload UI』重置圖形界面.

Stable Diffusion真人改動畫

Stable Diffusion真人改動畫

『Stable Diffusion』真人改動畫, 重點係揀適合模型,同埋設較細重绘幅度.

  1. 撳『Tagger』返推咒語引導生圖.
  2. 『Stable Diffusion checkpoint』模型揀『safetensors』.
  3. 撳『img2img文生圖』.
  4. 撳『Generation』->『img2img』
  5. 係『IMAGE』拖入原圖.
  6. 『Sampling method采樣法』揀『DPM-ADAPTIVE』.
  7. 『Sampling steps采樣步』填『20』.
  8. 『Resize by』->『scale』填『1』,與原圖寬高壹致.
  9. 『Denoising strength重绘幅度』填『3』,越細圖像與原圖越似.
  10. 撳『Generate』生成影像.
正向咒語Prompt 簡述
1girl,
arm support,
black skirt,
breasts,
brown eyes,
cleavage,
jacket,
lips,
long hair,
looking at viewer,
open clothes,
pencil skirt,
shirt,
sitting,
skirt,
smile,
solo


反向咒語Negative Prompt 簡述
(worst quality:2), 低質內容
(low quality:2), 低質內容
(normal quality:2), 低質內容
lowres, 低質內容
((monochrome)), 黑白
((grayscale)), 灰階
(monochrome), 單色
skin spots, 皮膚斑點
acnes, 痤瘡
skin blemishes, 皮膚瑕疵
age spot, 老人斑
glans, 龜頭
extra limbs, 多餘肢體
extra arms, 額外武器
extra legs, 多餘腳瓜瓤
extra leg, 多餘腳瓜瓤,
extra foot, 多餘腳掌
extra fingers, 手指太多
fewer fingers, 手指更少
strange fingers, 怪手指
missing arms, 缺手瓜
missing legs, 缺腳瓜瓤
missing fingers, 缺手指
fused fingers, 融合手指
too many fingers, 手指太多
bad hand, 歪手
(bad_prompt:0.8), 不良提示
bad anatomy, 解剖不良
bad hands, 歪手
bad feet,
bad body, 歪身歪勢,
bad proportions, 身體比例差,
gross proportions, 總比例
DeepNegative, 深度負面
(fat:1.2), 脂肪
looking away, 睇向別處
tilted head, 側頭
{Multiple people}, 多人
text, 文字
error, 錯字
extra digit, 額外數字
fewer digits, 細數
cropped, 裁剪
jpeg artifacts, 壓縮痕跡
signature, 簽名
watermark, 水印
username, 身份
blurry, 模糊
cropped, 裁剪
poorly drawn hands, 手畫得吾靚
poorly drawn face, 樣畫得吾靚
mutation, 突變
deformed, 變形
malformed limbs, 肢體畸形
long neck, 長頸
cross-eyed, 鬥雞眼
mutated hands, 手型變異
polar lowres, 極地低氣壓


Stable Diffusion替换背景

Stable Diffusion替换背景

利用遮罩替换背景

  1. segment anything』生成遮罩.
  2. 基礎模型『safetensors [299feccabf] 』
  3. 撳『Img2img圖生圖』
  4. 『Prompt』填『正面咒詞』.
  5. 『Negative Prompt』填『反面咒詞』.
  6. 撳『Generation』->『ipaint upload上傳遮罩』
  7. 『image』拖入原畫.
  8. 『mask』拖入遮罩.
  9. 『Resize mode』勾『Resize and fill填充』.
  10. 『mask blur遮罩边緣模糊度』值填『0』. 此值越大蝕占背景越大.
  11. 『mask mode遮罩模式』勾『Inpaint not masked重繪非遮罩內容』
  12. 『masked content蒙板區域內容處理』勾『original原圖』.
  13. 『Inpaint area』勾『Whole picture』.
  14. 『Sampling method』 揀『DPM++ 2M SDE Heun』.
  15. 『Sampling steps』 值填揀『20』
  16. 『Resize by』重置原畫尺寸. 值填『1:1填充』.
  17. 『Denoising strength重繪幅度』,值填『1』.
  18. 『seed』值填『1251813965』.
  19. 撳『Generate』生成
正面咒詞
Masterpiece, 傑作
Ultra high res, 超高解像
High quality, 高品質
4k, 4k
(Photorealistic:1.2), 真實感
Photo, 相片
No humans, 冇人
Classroom, 課室
Indoors, 室内


反向咒語Negative Prompt 簡述
sketches, 速寫,素描
( (monochrome) ), ( (greyscale) ), 黑白,灰階
facing away,

looking away,

人面避開,

眸目避開

(Text:4),error,extra digit,fewer digits, 文字,錯字,額外數字,細數
cropped,jpeg artifacts,blurry, 裁剪,壓縮痕跡,模糊,
signature,watermark,username, 簽名,水印,身份,
(worst quality:2),(low quality:2),(normal quality:2), (lowers), (normal quality), 低質內容
bad anatomy,

bad body,

bad hands,

extra limbs,

extra legs,

extra foot,

extra arms,

(too many fingers:2),

malformed limbs,

(fused fingers:2),

long neck,

bad proportions,

missing arms,

missing legs,

missing fingers,

歪身體構造,

歪身歪勢,

歪手,

多餘肢體,

多餘腳瓜瓤,

多餘腳掌,

額外武器,

手指太多,

畸形肢體,

融合手指,

長頸,

身體比例差,

缺手瓜,

缺腳瓜瓤,

缺手指,

Bad-artist, 衰明星
Bad-artist-anime, 衰動漫明星
Bad-prompt_version, 恶意版本2
Badhand, 坏人
Easynegative, 易阴性
Ng_deepnegative, Ng_deepnegative


Stable Diffusion插件-畫面識認segment anything

Stable Diffusion插件-畫面識認segment anything

Facebook开發『segment anything model』(SAM) 畫面識認,帮『ControlNet/Inpaint』重绘生成遮罩,重畫前後景,此版適合『Automatic1111’s WebUI』.

https://github.com/continue-revolution/sd-webui-segment-anything/archive/refs/heads/master.zip
https://github.com/continue-revolution/sd-webui-segment-anything


  1. 撳『Extensions擴展』->『Install from URL係網裝』
https://github.com/continue-revolution/sd-webui-segment-anything.git
  1. 撳『Install』下載.


  1. 手動下載『Segment Anything』
  2. 登入CMD命令行模式
  3. 指定當前資料夾
CD C:\stable-diffusion-webui\extensions\
  1. 下載『segment anything』
git clone https://github.com/continue-revolution/sd-webui-segment-anything.git
  1. 如出錯刪下列檔䅁夾,再重新下載
C:\stable-diffusion-webui\extensions\sd-webui-segment-anything
C:\stable-diffusion-webui\tmp\sd-webui-segment-anything


手工下載模型『segment anything model』越大越确.

https://dl.fbaipublicfiles.com/segment_anything/sam_vit_h_4b8939.pth
https://dl.fbaipublicfiles.com/segment_anything/sam_vit_l_0b3195.pth
https://dl.fbaipublicfiles.com/segment_anything/sam_vit_b_01ec64.pth
https://huggingface.co/lkeab/hq-sam/resolve/main/sam_hq_vit_h.pth
https://huggingface.co/lkeab/hq-sam/resolve/main/sam_hq_vit_l.pth
https://huggingface.co/lkeab/hq-sam/resolve/main/sam_hq_vit_b.pth

擺係sam資料夾.

C:\stable-diffusion-webui\extensions\sd-webui-segment-anything\models\sam


手工下載GroundingDINO模型

https://huggingface.co/ShilongLiu/GroundingDINO/resolve/main/GroundingDINO_SwinB.cfg.py?download=true
https://huggingface.co/ShilongLiu/GroundingDINO/resolve/main/GroundingDINO_SwinT_OGC.cfg.py?download=true
https://huggingface.co/ShilongLiu/GroundingDINO/resolve/main/groundingdino_swinb_cogcoor.pth?download=true
https://huggingface.co/ShilongLiu/GroundingDINO/resolve/main/groundingdino_swint_ogc.pth?download=true

擺係grounding-dino資料夾.

C:\stable-diffusion-webui\extensions\sd-webui-segment-anything\models\grounding-dino
  1. 使能本地编译『GroundingDINO』
  2. 撳『Settings』->『Segment Anything』
  3. 撳『Use local groundingdino to bypass C++ problem』用本地groundingdino繞過C++編譯問題.
  4. 撳『Apply settings』
  5. 撳『Reload UI』


  1. 允許『segment anything』傅递畀『ControlNet』
  2. 撳『Settings』->『ControlNet』
  3. 勾『Allow Other script to control this extension允許其他它脚本對擴展插件進行控制』.
  4. 撳『Apply settings』
  5. 撳『Reload UI』


  1. 撳『img2img』->『Segment Anything』
  2. 『SAM Model』擇『pth』
  3. 係『single image』上傅圖畫.
  4. 撳左鍵黑㸃保留區, 撳右鍵紅㸃剔除區.
  5. 撳『Remove all point prompts』剔除冚辦闌注㸃
  6. 勾『Enable GroundingDINO』啟用探測詞識認圖畫物件.
  7. 『GroundingDINO Model』擇『GroundingDNO_SwinB(938MB)』
  8. 『GroundingDINO Detection Prompt』填探測詞以『.』分割. 例如『text』.
  9. 『GroundingDINO Box Threshold』邊界框閾值.
  10. 勾『I want to preview GroundingDINO detection result and select the boxes I want.』預覽GroundingDINO檢測結果並選擇邊界框.
  11. 撳『Generate bounding box』生成邊界框.
  12. 『Select your favorite boxes:』勾『邊界框』『0』『1』『2』, 其中壹個.
  13. 撳『Preview Segmentation』預覽細分
  14. 勾『Copy to Inpaint Upload & img2img ControlNet Inpainting』自動上傳至『ControlNet』.
  15. 『Choose your favorite mask:』揀遮罩 勾『0』『1』『2』之壹.
  16. 勾『Expand Mask』展開遮罩,設『0~30』剔除边缘毛刺.
  17. 撳『Update Mask』更新遮罩.

Stable Diffusion插件除水印Cleaner

Stable Diffusion插件除水印Cleaner

上次『Inpaint』除水印,適用於颜色單調圖.層次豐富用『sd-webui-cleaner』插件. 此版適合『Automatic1111’s WebUI』.

  1. 撳『Extensions擴展』->『Install from URL係網裝』

『URL for extension’s git repository』填

https://github.com/novitalabs/sd-webui-cleaner.git

https://github.com/novitalabs/sd-webui-cleaner.git
  1. 撳『Install』下載
  2. 登入CMD命令行模式
  3. 網絡連可手動下載,指定當前資料夾
CD C:\stable-diffusion-webui\extensions\
  1. 直接下載插件『sd-webui-cleaner』
https://codeload.github.com/novitalabs/sd-webui-cleaner/zip/refs/heads/main
  1. 『sd-webui-cleaner』
python.exe -s -m pip install -r requirements.txt
  1. 首次𢴇行自動係『HuggingFace』下載模型.
https://huggingface.co/anyisalin/big-lama/resolve/main/big-lama.safetensors
  1. 模型擺係
C:\stable-diffusion-webui\extensions\sd-webui-cleaner\models
  1. 撳『Extensions』->『Installed』->『Apply and restart UI』重啟.
  2. 撳『Cleaner』->『Clean up』.
  3. 上傳圖畫,涂抹除字.
  4. 撳『Clean UP』除水印.


Stable Diffusion-LoRA模型

Stable Diffusion-LoRA模型

『LoRA』(Low-Rank Adaptation)模型,擴展名同樣係『.safetensors』.基於基礎模型訓練,作為基礎模型補充,大细係幾拾兆之間.係吾修改基礎模型,用小量數據訓練出獨特畫風模型.

『LoRA』模型擺係『C:\stable-diffusion-webui\models\Lora』後.帮『LoRA』模型添加封面,圖檔名與模型名壹致,同『LoRA』模型擺係壹起,撳『refresh page』刷新.

係『civitai.com』封面圖左上角會標『LoRA』字樣.

https://civitai.com/

撳『LoRA』模型自動添加咒詞.且可叠加,并設權重.初始值1.

<lora:模型名:權重值>
<lora:hina:1>


模型 位置
基礎模型 C:\stable-diffusion-webui\models\Stable-diffusion
LoRA模型 C:\stable-diffusion-webui\models\Lora


LoRA模型 Lora_model.safetensors
封面圖 Lora_model.png


Stable Diffusion改背景

Stable Diffusion改背景
Stable Diffusion改背景

用AI改圖背景,用photoshop做『蒙板』,限黑白孖色,背景填充白色,人像填充黑色.

  1. 基礎模型『safetensors [299feccabf] 』
  2. 撳『Img2img圖生圖』
  3. 『Prompt』填『正面咒詞』
  4. 撳『Generation』->『ipaint upload上傳蒙板』
  5. 『image』拖入原畫.
  6. 『mask』托入蒙板,黑白孖色,背景白,人像黑.
  7. 『Resize mode』勾『Resize and fill填充』.
  8. 『mask blur蒙板边緣模糊度』值填 此值越大蝕占背景越大.
  9. 『mask mode蒙板模式』勾『Inpaint masked重繪蒙板內容』
  10. 『masked content蒙板區域內容處理』勾『original原圖』.
  11. 『Resize by』重置原畫尺寸. 值填『1:1填充』.
  12. 『Denoising strength重繪幅度』,值填『4~0.5』.
  13. 撳『Generate』生成
正面咒詞
Masterpiece, 傑作
Ultra high res, 超高解像
High quality, 高品質
4k, 4k
(Photorealistic:1.2), 真實感
Photo, 相片
No humans, 冇人
Japanese stairs, 日本樓梯
flower 日本建筑
japanese architecture, 日本建筑
Japanese Street 日本街道
Indoors, 室内
Outdoors, 戶外
Scenery, 風景
Tree,
Sky,
Cloud,
Day, 日頭
Rock, 岩石
Mountain,
Grass,
Water,
River,
Blue sky, 藍天
Reflection, 水映
Building, 建筑
Architecture, 建筑風格
House, 别墅
Bridge,
Pond, 池塘
Cast Asian architecture, 亚洲建筑
Cloudy sky, 多云天空


反向咒語Negative Prompt 簡述
sketches, 速寫,素描
( (monochrome) ), ( (greyscale) ), 黑白,灰階
facing away,

looking away,

人面避開,

眸目避開

(Text:4),error,extra digit,fewer digits, 文字,錯字,額外數字,細數
cropped,jpeg artifacts,blurry, 裁剪,壓縮痕跡,模糊,
signature,watermark,username, 簽名,水印,身份,
(worst quality:2),(low quality:2),(normal quality:2), (lowers), (normal quality), 低質內容
bad anatomy,

bad body,

bad hands,

extra limbs,

extra legs,

extra foot,

extra arms,

(too many fingers:2),

malformed limbs,

(fused fingers:2),

long neck,

bad proportions,

missing arms,

missing legs,

missing fingers,

歪身體構造,

歪身歪勢,

歪手,

多餘肢體,

多餘腳瓜瓤,

多餘腳掌,

額外武器,

手指太多,

畸形肢體,

融合手指,

長頸,

身體比例差,

缺手瓜,

缺腳瓜瓤,

缺手指,

Bad-artist, 衰明星
Bad-artist-anime, 衰動漫明星
Bad-prompt_version, 恶意版本2
Badhand, 坏人
Easynegative, 易阴性
Ng_deepnegative, Ng_deepnegative


Stable Diffusion-咒詞反推WD 1.4 Tagger

Stable Diffusion-咒詞反推WD 1.4 Tagger

咒詞反推『Clip』同『DeepBooru』之外,仲有『WD 1.4 Tagger』, 生成咒詞并以權重排序.排前權重高排後權重低.此版適合『Automatic1111’s WebUI』.

  1. 撳『Extensions擴展』->『Install from URL係網裝』
  2. 『URL for extension’s git repository』填『https://github.com/picobyte/stable-diffusion-webui-wd14-tagger.git
https://github.com/picobyte/stable-diffusion-webui-wd14-tagger.git
  1. 撳『Install』下載
  2. 登入CMD命令行模式
  3. 手動下載,指定當前資料夾
CD C:\stable-diffusion-webui\extensions\
  1. 下載『stable-diffusion-webui-wd14-tagger』
git clone https://github.com/picobyte/stable-diffusion-webui-wd14-tagger.git
  1. 如果出錯刪下列檔䅁夾,再重新下載
C:\stable-diffusion-webui\extensions\stable-diffusion-webui-wd14-tagger
C:\stable-diffusion-webui\tmp\stable-diffusion-webui-wd14-tagger
  1. 撳『Apply and restart UI』重啟
  2. 登入CMD命令行模式
  3. 指定當前資料夾
CD C:\stable-diffusion-webui\extensions\stable-diffusion-webui-wd14-tagger
  1. 『WD 1.4 Tagger』
python.exe -s -m pip install -r requirements.txt
  1. 首次𢴇行自動係『HuggingFace』下載.
  2. 撳『Extensions』->『Installed』->『Apply and restart UI』重啟.
  3. Python裝ONNX Runtime
  4. 撳『Tagger』上傳圖畫.
  5. 係『Interrogator』揀『模型』.
  6. 撳『Interrogate image』反推『圖畫』咒詞.
  7. 首次𢴇行係『https://huggingface.co』下載模型.由於位於墙外要
  8. 係『Ratings and included tags』得到咒詞.


批量生成咒詞.

  1. 撳『Tagger』->『Batch from directory』
  2. 『Input directory』填圖畫資料夾路徑.
  3. 『Output directory』填生成咒詞資料夾路徑.
  4. 撳『Interrogate』反推『圖畫』咒詞,以圖畫同名『.txt』存儲.


Interrogate image 反推圖畫
Ratings and included tags 評級標簽
Excluded tags 排除標簽
  1. 下載模型文檔
https://github.com/KichangKim/DeepDanbooru/releases
https://discord.gg/BDFpq9Yb7K
  1. 将模型和配置移至資料夹『C:\stable-diffusion-webui\models\deepdanbooru』
C:\stable-diffusion-webui\models\deepdanbooru\deepdanbooru-v1-20191108-sgd-e30
C:\stable-diffusion-webui\models\deepdanbooru\deepdanbooru-v3-20200101-sgd-e30
C:\stable-diffusion-webui\models\deepdanbooru\deepdanbooru-v3-20200915-sgd-e30
C:\stable-diffusion-webui\models\deepdanbooru\deepdanbooru-v3-20211112-sgd-e28
C:\stable-diffusion-webui\models\deepdanbooru\deepdanbooru-v4-20200814-sgd-e30
  1. 係『stable-diffusion-webui-wd14-tagger』下新建『models』資料夾.
C:\stable-diffusion-webui\extensions\ stable-diffusion-webui-wd14-tagger \models
  1. 開啟下列網頁,分別下載『onnx』同『selected_tags.csv』
https://huggingface.co/SmilingWolf/wd-vit-tagger-v3
https://huggingface.co/SmilingWolf/wd-swinv2-tagger-v3
https://huggingface.co/SmilingWolf/wd-convnext-tagger-v3
https://huggingface.co/SmilingWolf/wd-v1-4-moat-tagger-v2
https://huggingface.co/SmilingWolf/wd-v1-4-convnextv2-tagger-v2
https://huggingface.co/SmilingWolf/wd-v1-4-convnext-tagger-v2
https://huggingface.co/SmilingWolf/wd-v1-4-convnext-tagger
https://huggingface.co/SmilingWolf/wd-v1-4-vit-tagger-v2
https://huggingface.co/SmilingWolf/wd-v1-4-swinv2-tagger-v2
https://huggingface.co/SmilingWolf/wd-v1-4-vit-tagger
  1. 下載後重命名為,并复制至『C:\stable-diffusion-webui\extensions\stable-diffusion-webui-wd14-tagger\models』資料夾.
wd-vit-tagger-v3.onnx
wd-vit-tagger-v3.csv
wd-swinv2-tagger-v3.onnx
wd-swinv2-tagger-v3.csv
wd-convnext-tagger-v3.onnx
wd-convnext-tagger-v3.csv
wd-v1-4-moat-tagger-v2.onnx
wd-v1-4-moat-tagger-v2.csv
wd-v1-4-convnextv2-tagger-v2.onnx
wd-v1-4-convnextv2-tagger-v2.csv
wd-v1-4-convnext-tagger-v2.onnx
wd-v1-4-convnext-tagger-v2.csv
wd-v1-4-convnext-tagger.onnx
wd-v1-4-convnext-tagger.csv
wd-v1-4-vit-tagger-v2.onnx
wd-v1-4-vit-tagger-v2.csv
wd-v1-4-swinv2-tagger-v2.onnx
wd-v1-4-swinv2-tagger-v2.csv
wd-v1-4-vit-tagger.onnx
wd-v1-4-vit-tagger.csv


Python裝ONNX Runtime

Python裝ONNX Runtime
Python裝ONNX Runtime

ONNX(Open Neural Network Exchange) 神經網络推理型模,支持『Python』同『C++』. 分『CPU』同『GPU』版.

登入命令行模式

裝ONNX Runtime-CPU版

pip install onnxruntime

裝ONNX Runtime-GPU版,適用cuda 11.x

pip install onnxruntime-gpu

裝ONNX Runtime-GPU版,適用cuda 12.x

pip install onnxruntime-gpu –extra-index-url https://aiinfra.pkgs.visualstudio.com/PublicPackages/_packaging/onnxruntime-cuda-12/pypi/simple/


Stable Diffusion-咒詞反推Clip同DeepBooru

Stable Diffusion-咒詞反推Clip同DeepBooru

咒師經驗豐富可寫出契合貼近咒詞.『Stable Diffusion』內置『Clip』同埋『DeepBooru』.對『圖畫』分析反推算出咒詞.首次啟用需下載模型文檔.

新版『Stable Diffusion』『Clip』同『DeepBooru』缩細為两細圖標,係『img2img』->『Generate』下側. 『Clip』生成語句咒語,『DeepBooru』生成單詞咒詞效果更佳.

  1. 撳『img2img』
  2. 拖入『圖畫』
  3. 撳『Clip』或『DeepBooru』 .


『Clip』反推下載『model_base_caption_capfilt_large.pth

https://storage.googleapis.com/sfr-vision-language-research/BLIP/models/model_base_caption_capfilt_large.pth

下載後擺係『C:\stable-diffusion-webui\models\BLIP\』

C:\stable-diffusion-webui\models\BLIP\model_base_caption_capfilt_large.pth


『DeepBooru』反推下載『model-resnet_custom_v3.pt

https://github.com/AUTOMATIC1111/TorchDeepDanbooru/releases/download/v1/model-resnet_custom_v3.pt

下載後擺係『C:\stable-diffusion-webui\models\torch_deepdanbooru\』

C:\stable-diffusion-webui\models\torch_deepdanbooru\model-resnet_custom_v3.pt


Stable Diffusion吉屋裝修

Stable Diffusion吉屋裝修

『吉屋裝修』用『ControlNet』『MLSD直線』提取建筑直線幾何邊界,後重新上色.添刪咒詞控制屋內家私.

  1. 撳『txt2img文生圖』.
  2. 加入咒語引導生圖.
Prompt 正面咒詞
Floor, 地板
High resolution, 高解像
Modern style, 現代風格
(window:1.3), 窗門
tv cabinet, 電視櫃
(Big tv:1.3), 大電視
(couch:1.5), 瞓椅
Ceiling lamp, 吸頂燈
(A set of sofas:2), 沙發
(A coffee table:2), 咖啡臺


山水場景 簡述
mountain,
On a hill, 山上
Valley, 山谷
The top of the hill, 山頂
Beautiful detailed sky,

Beautiful detailed water,

天清水靚
On the beach, 海滩
On the ocean, 大海
In a meadow, 草原
landscape, 開闊風景
Night, 晚黑
In the rain, 雨中
Rainy days, 兩天
cloudy, 多雲
Full moon, 圓月
cloud,
moon, 月球
moonlight, 月光


季節 簡述
In spring,
In summer,
In autumn,
In winter,


Negative prompt 反向咒詞
Easy Negative, 易阴性
low resolution, 低像素
Text, 文字
Error, 錯字
Extra digit, 額外數位
fewer digits, 細數
cropped, 裁剪,
jpeg artifacts, 壓縮痕跡,
blurry, 模糊,
Cropped, 裁剪
blurry, 模糊,
Signature, 簽名
watermark, 水印
Username, 身份
(worst quality:2) , 質量差
(low quality:2) , 質量低
(normal quality:2) , 質量正常
(lowers), 低像素
(plant:1.4), 草木
Nsfw, Not Safe For Work,唔适宜係辦公場所睇.
  1. 『Sampling method采樣法』揀『DPM-ADAPTIVE』.
  2. 『Sampling steps采樣步』填『30』.
  3. 『WIDTH』『HEIGHT』與原圖壹至致.
  4. 撳『ControlNet』
  5. 係『IMAGE』拖入原圖.
  6. 勾『Enable』使能,啟用『ControlNet』.
  7. 勾『Pixel Perfect』完美像素.
  8. 勾『Allow Preview』允許預覽.
  9. 『Control Type』勾『MLSD』.
  10. 『Preprocessor』擇『mlsd』.
  11. 『Model』擇『Control_v11p_sd15_mlsd』.
  12. 撳『Generate』生成影像.


Stable Diffusion舊相修复

Stable Diffusion舊相修复

舊相掃描後微粒偏大.『Stable Diffusion』支持舊相冇損修复.

  1. 撳『Extras』->『Single Image』
  2. 『拖入畫像Drop Image Here』或『載入畫像Click to Upload』
  3. 勾『Upscale』高清放大
  4. 放大算法1『Upscaler 1』揀『R-ESRGAN 4x+』
  5. 放大算法2『Upscaler 2』揀『R-ESRGAN General WDN 4xV3』
  6. 放大算法2比重『Upscaler 2 visibility』設『5』.
  7. 勾『GFPGAN』畫像放大算法,『Visibility』設『1』.
  8. 勾『CodeFormer』人脸重建算法,五官細微改變.『Visibility』設『1』, 『Weight』設『0』.
  9. 撳『Generate』生成畫像.


放大算法 效果
Lanczos 冇損高質放大算法
Nearest 傳統放大算法,去噪差,放大效果差,
BSRGAN 細節佳,速度快,色彩暗
ESRGAN_4x 去噪差
LDSR 放大效果差
R-ESRGAN 4x 放大現實畫像效果佳
R-ESRGAN 4x Anime6B 放大動畫畫像效果佳
ScuNET 放大效果差
ScuNET PSNR 放大效果差
SwinIR 4x 放大效果差


Stable Diffusion真人改漫畫

Stable Diffusion真人改漫畫

『Stable Diffusion』繪畫動人興奮,玩真人改漫畫,用『ControlNet』『Canny』提取線稿,後重新上色.效果比手機,色彩轉真人改漫畫,高幾皮.

  1. 撳『txt2img文生圖』.
  2. 加入咒語引導生圖.
正向咒語Prompt 簡述
Masterpiece, 傑作
Ultra high res, 超高解像
High quality, 高品質
4k, 4k
(Photorealistic:1.2), 真實感
Photo, 相片
A beautiful girl, 靚女


反向咒語Negative Prompt 簡述
sketches, 速寫,素描
( (monochrome) ), ( (greyscale) ), 黑白,灰階
facing away,

looking away,

人面避開,

眸目避開

text,error,extra digit,fewer digits, 文字,錯字,額外數字,細數
cropped,jpeg artifacts,blurry, 裁剪,壓縮痕跡,模糊,
signature,watermark,username, 簽名,水印,身份,
(worst quality:2),(low quality:2),(normal quality:2), (lowers), (normal quality), 低質內容
bad anatomy,

bad body,

bad hands,

extra limbs,

extra legs,

extra foot,

extra arms,

(too many fingers:2),

malformed limbs,

(fused fingers:2),

long neck,

bad proportions,

missing arms,

missing legs,

missing fingers,

歪身體構造,

歪身歪勢,

歪手,

多餘肢體,

多餘腳瓜瓤,

多餘腳掌,

額外武器,

手指太多,

畸形肢體,

融合手指,

長頸,

身體比例差,

缺手瓜,

缺腳瓜瓤,

缺手指,

Bad-artist, 衰明星
Bad-artist-anime, 衰動漫明星
Bad-prompt_version, 恶意版本2
Badhand, 坏人
Easynegative, 易阴性
Ng_deepnegative, Ng_deepnegative
  1. 『Sampling method采樣法』揀『DPM-ADAPTIVE』.
  2. 『Sampling steps采樣步』填『30』.
  3. 『WIDTH』『HEIGHT』與原圖壹至致.
  4. 撳『ControlNet』
  5. 係『IMAGE』拖入原圖.
  6. 勾『Enable』使能,啟用『ControlNet』.
  7. 勾『Pixel Perfect』完美像素.
  8. 勾『Allow Preview』允許預覽.
  9. 『Control Type』勾『Canny硬邊緣檢測』.
  10. 『Preprocessor』擇『canny』.
  11. 『Model』擇『Control_v11p_sd_canny』.
  12. 撳『Generate』生成影像.


Stable Diffusion外網訪問–share

Stable Diffusion外網訪問--share
Stable Diffusion外網訪問–share

Stable_Diffusion_share

Stable Diffusion外網訪問–share

之前利用『–listen』係內網訪問『Stable Diffusion』電腦,利用『–share』係外網訪問『Stable Diffusion』.

  1. 編缉『webui-user.bat』
C:\stable-diffusion-webui\webui-user.bat
  1. 對『bat』添加『– share』参數.
set COMMANDLINE_ARGS=–share
  1. 下載『frpc_windows_amd64.exe』.
https://cdn-media.huggingface.co/frpc-gradio-0.2/frpc_windows_amd64.exe
  1. 重命名為『frpc_windows_amd64_v0.2』,冇擴展名.
  2. 复制到『gradio』資料夾
C:\stable-diffusion-webui\venv\lib\site-packages\gradio
  1. 得到『https://684da9579597aa77c4.gradio.live』 此鏈接在72小時後過期
https://684da9579597aa77c4.gradio.live


1. Download this file: https://cdn-media.huggingface.co/frpc-gradio-0.2/frpc_windows_amd64.exe
2. Rename the downloaded file to: frpc_windows_amd64_v0.2
3. Move the file to this location: C:\stable-diffusion-webui\venv\lib\site-packages\gradio


This share link expires in 72 hours. For free permanent hosting and GPU upgrades, run `gradio deploy` from Terminal to deploy to Spaces (https://huggingface.co/spaces)


Stable Diffusion下載安裝-ControlNet

Stable Diffusion下載安裝-ControlNet

『ControlNet』含『插件』『模型』分開下載.

『Stable Diffusion』裝『插件』需編輯『webui-user.bat』,加入命令行参式『–enable-insecure-extension-access』啟用插件訪問.

C:\stable-diffusion-webui\webui-user.bat
set COMMANDLINE_ARGS=–listen –enable-insecure-extension-access

下載插件方式1:

  1. 撳『Extensions擴展』->『Install from URL係網裝』
  2. 『URL for extension’s git repository』填『https://github.com/Mikubill/sd-webui-controlnet
https://github.com/Mikubill/sd-webui-controlnet.git
  1. 撳『Install』下載


下載插件方式2:

  1. 撳『Extensions擴展』->『Available可下載』
https://raw.githubusercontent.com/AUTOMATIC1111/stable-diffusion-webui-extensions/master/index.json
  1. 撳『Load from:加載擴展列表』搜索下載列表.
  2. 『sd-webui-controlnet』撳『Install』下載


  1. 撳『Extensions擴展』->『Installed已裝』
  2. 撳『Check for updates檢查更新』
  3. 撳『Apply and restart UI應用後重啟界面』
  4. 係『txt2img』『img2img』下側『ControlNet』
  5. 如果出錯刪下列檔䅁夾, 在重新下載
C:\stable-diffusion-webui\extensions\sd-webui-controlnet
C:\stable-diffusion-webui\tmp\sd-webui-controlnet


『雙精度模型』『ControlNet-v1-1

https://huggingface.co/lllyasviel/ControlNet-v1-1/tree/main

下載『ControlNet』雙精度模型.

control_v11e_sd15_ip2p.pth InstructP2P
control_v11e_sd15_ip2p.yaml  
control_v11e_sd15_shuffle.pth Shuffle随機洗牌
control_v11e_sd15_shuffle.yaml  
control_v11f1e_sd15_tile.pth Tile/Blur
control_v11f1e_sd15_tile.yaml  
control_v11f1p_sd15_depth.pth Depth深度
control_v11f1p_sd15_depth.yaml  
control_v11p_sd15_canny.pth Canny硬邊緣
control_v11p_sd15_canny.yaml  
control_v11p_sd15_inpaint.pth Inpaint局部重繪
control_v11p_sd15_inpaint.yaml  
control_v11p_sd15_lineart.pth Lineart線稿
control_v11p_sd15_lineart.yaml  
control_v11p_sd15_mlsd.pth MLSD直線
control_v11p_sd15_mlsd.yaml  
control_v11p_sd15_normalbae.pth NormalMap法線貼圖
control_v11p_sd15_normalbae.yaml  
control_v11p_sd15_openpose.pth OpenPose姿勢
control_v11p_sd15_openpose.yaml  
control_v11p_sd15_scribble.pth Scribble䓍圖
control_v11p_sd15_scribble.yaml  
control_v11p_sd15_seg.pth Segmentation語義分割
control_v11p_sd15_seg.yaml  
control_v11p_sd15_softedge.pth SoftEdge軟邊緣
control_v11p_sd15_softedge.yaml  
control_v11p_sd15s2_lineart_anime.pth Lineart anime動圖線稿
control_v11p_sd15s2_lineart_anime.yaml  


『單精度模型』

https://huggingface.co/comfyanonymous/ControlNet-v1-1_fp16_safetensors/tree/main

下載『ControlNet』單精度模型.

control_lora_rank128_v11e_sd15_ip2p_fp16.safetensors
control_lora_rank128_v11e_sd15_shuffle_fp16.safetensors
control_lora_rank128_v11f1e_sd15_tile_fp16.safetensors
control_lora_rank128_v11f1p_sd15_depth_fp16.safetensors
control_lora_rank128_v11p_sd15_canny_fp16.safetensors
control_lora_rank128_v11p_sd15_inpaint_fp16.safetensors
control_lora_rank128_v11p_sd15_lineart_fp16.safetensors
control_lora_rank128_v11p_sd15_mlsd_fp16.safetensors
control_lora_rank128_v11p_sd15_normalbae_fp16.safetensors
control_lora_rank128_v11p_sd15_openpose_fp16.safetensors
control_lora_rank128_v11p_sd15_scribble_fp16.safetensors
control_lora_rank128_v11p_sd15_seg_fp16.safetensors
control_lora_rank128_v11p_sd15_softedge_fp16.safetensors
control_lora_rank128_v11p_sd15s2_lineart_anime_fp16.safetensors
control_v11e_sd15_ip2p_fp16.safetensors
control_v11e_sd15_shuffle_fp16.safetensors
control_v11f1e_sd15_tile_fp16.safetensors
control_v11f1p_sd15_depth_fp16.safetensors
control_v11p_sd15_canny_fp16.safetensors
control_v11p_sd15_inpaint_fp16.safetensors
control_v11p_sd15_lineart_fp16.safetensors
control_v11p_sd15_mlsd_fp16.safetensors
control_v11p_sd15_normalbae_fp16.safetensors
control_v11p_sd15_openpose_fp16.safetensors
control_v11p_sd15_scribble_fp16.safetensors
control_v11p_sd15_seg_fp16.safetensors
control_v11p_sd15_softedge_fp16.safetensors
control_v11p_sd15s2_lineart_anime_fp16.safetensors
control_v11u_sd15_tile_fp16.safetensors


下载支持SDXL1.0-ControlNet模型

https://huggingface.co/lllyasviel/sd_control_collection/tree/main

下載『ControlNet』SDXL1.0模型

https://huggingface.co/lllyasviel/sd_control_collection/resolve/main/diffusers_xl_canny_full.safetensors?download=true
https://huggingface.co/lllyasviel/sd_control_collection/resolve/main/diffusers_xl_depth_full.safetensors?download=true
https://huggingface.co/lllyasviel/sd_control_collection/resolve/main/ioclab_sd15_recolor.safetensors?download=true
https://huggingface.co/lllyasviel/sd_control_collection/resolve/main/ip-adapter_sd15.pth?download=true
https://huggingface.co/lllyasviel/sd_control_collection/resolve/main/ip-adapter_sd15_plus.pth?download=true
https://huggingface.co/lllyasviel/sd_control_collection/resolve/main/ip-adapter_xl.pth?download=true
https://huggingface.co/lllyasviel/sd_control_collection/resolve/main/kohya_controllllite_xl_blur.safetensors?download=true
https://huggingface.co/lllyasviel/sd_control_collection/resolve/main/kohya_controllllite_xl_blur_anime.safetensors?download=true
https://huggingface.co/lllyasviel/sd_control_collection/resolve/main/kohya_controllllite_xl_blur_anime_beta.safetensors?download=true
https://huggingface.co/lllyasviel/sd_control_collection/resolve/main/kohya_controllllite_xl_canny.safetensors?download=true
https://huggingface.co/lllyasviel/sd_control_collection/resolve/main/kohya_controllllite_xl_canny_anime.safetensors?download=true
https://huggingface.co/lllyasviel/sd_control_collection/resolve/main/kohya_controllllite_xl_depth.safetensors?download=true
https://huggingface.co/lllyasviel/sd_control_collection/resolve/main/kohya_controllllite_xl_depth_anime.safetensors?download=true
https://huggingface.co/lllyasviel/sd_control_collection/resolve/main/kohya_controllllite_xl_openpose_anime.safetensors?download=true
https://huggingface.co/lllyasviel/sd_control_collection/resolve/main/kohya_controllllite_xl_openpose_anime_v2.safetensors?download=true
https://huggingface.co/lllyasviel/sd_control_collection/resolve/main/kohya_controllllite_xl_scribble_anime.safetensors?download=true
https://huggingface.co/lllyasviel/sd_control_collection/resolve/main/sai_xl_canny_128lora.safetensors?download=true
https://huggingface.co/lllyasviel/sd_control_collection/resolve/main/sai_xl_canny_256lora.safetensors?download=true
https://huggingface.co/lllyasviel/sd_control_collection/resolve/main/sai_xl_depth_128lora.safetensors?download=true
https://huggingface.co/lllyasviel/sd_control_collection/resolve/main/sai_xl_depth_256lora.safetensors?download=true
https://huggingface.co/lllyasviel/sd_control_collection/resolve/main/sai_xl_recolor_128lora.safetensors?download=true
https://huggingface.co/lllyasviel/sd_control_collection/resolve/main/sai_xl_recolor_256lora.safetensors?download=true
https://huggingface.co/lllyasviel/sd_control_collection/resolve/main/sai_xl_sketch_128lora.safetensors?download=true
https://huggingface.co/lllyasviel/sd_control_collection/resolve/main/sai_xl_sketch_256lora.safetensors?download=true
https://huggingface.co/lllyasviel/sd_control_collection/resolve/main/sargezt_xl_depth.safetensors?download=true
https://huggingface.co/lllyasviel/sd_control_collection/resolve/main/sargezt_xl_depth_faid_vidit.safetensors?download=true
https://huggingface.co/lllyasviel/sd_control_collection/resolve/main/sargezt_xl_depth_zeed.safetensors?download=true
https://huggingface.co/lllyasviel/sd_control_collection/resolve/main/sargezt_xl_softedge.safetensors?download=true
https://huggingface.co/lllyasviel/sd_control_collection/resolve/main/t2i-adapter_diffusers_xl_canny.safetensors?download=true
https://huggingface.co/lllyasviel/sd_control_collection/resolve/main/t2i-adapter_diffusers_xl_depth_midas.safetensors?download=true
https://huggingface.co/lllyasviel/sd_control_collection/resolve/main/t2i-adapter_diffusers_xl_depth_zoe.safetensors?download=true
https://huggingface.co/lllyasviel/sd_control_collection/resolve/main/t2i-adapter_diffusers_xl_lineart.safetensors?download=true
https://huggingface.co/lllyasviel/sd_control_collection/resolve/main/t2i-adapter_diffusers_xl_openpose.safetensors?download=true
https://huggingface.co/lllyasviel/sd_control_collection/resolve/main/t2i-adapter_diffusers_xl_sketch.safetensors?download=true
https://huggingface.co/lllyasviel/sd_control_collection/resolve/main/t2i-adapter_xl_canny.safetensors?download=true
https://huggingface.co/lllyasviel/sd_control_collection/resolve/main/t2i-adapter_xl_openpose.safetensors?download=true
https://huggingface.co/lllyasviel/sd_control_collection/resolve/main/t2i-adapter_xl_sketch.safetensors?download=true
https://huggingface.co/lllyasviel/sd_control_collection/resolve/main/thibaud_xl_openpose.safetensors?download=true
https://huggingface.co/lllyasviel/sd_control_collection/resolve/main/thibaud_xl_openpose_256lora.safetensors?download=true


將下載『.pth模型』『.yaml描述』『.safetensors模型』复制至models檔䅁夾

『C:\stable-diffusion-webui\extensions\sd-webui-controlnet\models』

模型標記 模型版本 品質 SD版本 預處理 文檔擴展名
control v11-1.1版 e實驗品 sd15 ip2p .pth模型
  v11f1修正版1 p正品 sd21   .yaml描述
    u半成品     .safetensors模型


下载VAE模型

https://huggingface.co/stabilityai/sdxl-vae
sdxl_vae.safetensors

擺係

C:\stable-diffusion-webui\models\VAE


  1. 撳『Settings』->『Stable Diffusion』
  2. 『Random number generator source.亂數生成源』揀『CPU』.
  3. 撳『Settings』->『Sampler parameters』
  4. 勾『SGM noise multiplier』將初始雜訊與官方SDXL實現相配-僅適用於再現影像.
  5. 撳『Settings』->『Compatibility』
  6. 勾『Do not make DPM++ SDE deterministic across different batch sizes.』保留 DPM++SDE采样器在不同批量之间结果差异.
  7. 撳『Apply settings』應用設定.
  8. 撳『Reload UI』重置圖形界面.


係『txt2img』『img2img』下側『ControlNet』

Enable使能 勾選後撳『ControlNet』先啟用.
Low VRAM低顯存 顯存細過4GB,勾選
Pixel Perfect完美像素 自動匹配解像,實現最佳效果
Allow Preview 允許預覽
Effective Region Mask有效區遮擋  
Upload independent control image上傳獨立控制影畫  
Preprocessor預處理  
Model模型  
Control Weight權重 ControlNet對影像影響值, 權重值設0.6~1.1
Starting Control Step 開始介入時機,默認0,叢開始影響影像.
Ending Control Step 結束介入時機,默認1,對影像影響至結束
Annotator resolution 影像解像
Canny-Low threshold 值越低越細致
Canny-High threshold 值越高越粗糙


Control類型  
all 冚辦闌
Canny 硬邊緣
Depth 深度
IP-Adapter 圖生圖
Inpaint 局部重繪
Instant-ID  
InstructP2P 指導圖生圖
Lineart 線稿
MLSD 直線
NormalMAP 法線貼圖
OpenPose 姿勢
Recolor 重新上色
Reference 引用
Revision 修正
Scribble 涂鴉
Segmentation 語義分割
Shuffle  
SoftEdge  
SparseCTRL  
T2I-Adapter 文生圖
Tile 平鋪


Stable Diffusion装网址插件AssertionError extension access disabled because of command line flags

Stable Diffusion装网址插件AssertionError extension access disabled because of command line flags

撳『Extensions擴展』->『Install from URL网址安装』->裝『ControlNet』時報錯.

AssertionError:extension access disabled because of command line flags

主因係『–listen』開啟監聲後,禁止安裝插件. 加入『–enable-insecure-extension-access』啟用危險擴展訪問.

編輯『C:\stable-diffusion-webui\webui-user.bat』

加入『set COMMANDLINE_ARGS=–xformers –listen –enable-insecure-extension-access』


Stable Diffusion咒詞

『提示詞』亦呌『咒詞』.

『提示詞』分『正向提示詞Positive Prompt』『反向提示詞Negative Prompt』.

『正向提示詞』指定鐘意特征.

『反向提示詞』消除唔鐘意特征.

『提示詞』越多越符合指望. 『提示詞』以『,』分隔,排序越前權重越高,排序越後權重越低,忽略『吉格』『换行』.

『提示詞』權重默認係1. 可通過()改變權重

提示詞語法 描述
girl,silk, 分隔提示詞
(girl:3), 權重提升3倍, 權重=0.1~100
(girl), 提升1.1倍
((girl)), 提升1.1*1.1=1.21倍
(((girl))), 提升1.1*1.1*1.1=1.331倍
[girl], 下降1.1倍
[[girl]], 下降1.1*1.1=1.21倍
[[[girl]]], 下降1.1*1.1*1.1=1.331倍
Girl | cat, 混合體
Girl And cat , 元素混合
Lovely[cow|horse],  


反向提示詞Negative Prompt 簡述
(nsfw), Not Safe For Work,唔适宜係辦公場所睇.
sketches, 速寫,素描
(worst quality:2),(low quality:2),(normal quality:2), (lowers), (normal quality), 低質內容
( (monochrome) ), ( (greyscale) ), 黑白,灰階
facing away,

looking away,

人面避開,

眸目避開

text,error,extra digit,fewer digits, 文字,錯字,額外數字,細數
cropped,jpeg artifacts,blurry, 裁剪,壓縮痕跡,模糊,
signature,watermark,username, 簽名,水印,身份,
bad anatomy,

bad body,

bad hands,

extra limbs,

extra legs,

extra foot,

extra arms,

too many fingers,

malformed limbs,

fused fingers,

long neck,

bad proportions,

missing arms,

missing legs,

missing fingers,

歪身體構造,

歪身歪勢,

歪手,

多餘肢體,

多餘腳瓜瓤,

多餘腳掌,

額外武器,

手指太多,

畸形肢體,

融合手指,

長頸,

身體比例差,

缺手瓜,

缺腳瓜瓤,

缺手指,


畫質 簡述
High quality, 高畫質
Masterpiece, 杰作
8k,  
Hight definition, 高清
HD 高清
Highly realistic, 超現實


山水場景 簡述
mountain,
On a hill, 山上
Valley, 山谷
The top of the hill, 山頂
Beautiful detailed sky,

Beautiful detailed water,

天清水靚
On the beach, 海滩
On the ocean, 大海
In a meadow, 草原
landscape, 開闊風景
Night, 晚黑
In the rain, 雨中
Rainy days, 兩天
cloudy, 多雲
Full moon, 圓月
cloud,
moon, 月球
moonlight, 月光


季節 簡述
In spring,
In summer,
In autumn,
In winter,


畫風/風格 簡述
Contour deepening, 輪廓加深
Flat color, 纯色
Monochrome, 單色
Partially  colored, 部分着色
Chromatic aberration, 色差失焦
CG, 提升畫質
Comic, 動漫
Sketch, 素描
Pixel art, 像素
Photo, 影相
Illustration, 插畫
animation 動漫


鏡頭 簡述
Pov, 正面視角
Full body, 正面冚身視角
Cowboy shot, 正面上身視角
Dramatic angle 戲劇視角
From below, 45度俯視
Bust, 半身像
Upper body, 上身
From behind, 後面
Back, 背影
Profile, 側身
Turning around, 回眸
Multiple views, 多視角


光效 簡述
God rays, 神光
Glowing light, 熒光
Sparkle, 閃耀
Blurry, 模糊
Lens flare, 光暈
Overexposure, 過曝
Ray tracing, 光線追踪
Reflection light, 反射光
Motion blur, 動態模糊
Cinematic lighting, 电影光效
Jpeg artifacts, 壓縮失真
Colorful refraction, 彩光折射
Golden hour lighting, 暖金色光照
Strong rim light, 輪廓光
Intense shadows, 强陰影


色調 簡述
xx hue xx色調
colorful 彩色
Vivid colors 鮮色
nostalgia 怀舊
bright 光亮
High contrast 高對比
High saturation 高飽和
greyscale 灰色


髮色 簡述
Purple hair 紫髮
Silver hair 銀髮
Dark blue hair 深藍髮
Light blue hair 淺藍髮
Blonde hair 金髮
Colored inner hair 髮底彩
Streaked hair 單株彩髮
Gradient hair 漸變彩髮


髮形 簡述
Hair bun 西瓜頭
Ponytail 馬尾
Drill hair 公主卷
Messy hair 散髮
braid
Twin braids 孖辫
Wavy hair 波浪卷
bangs 髮陰


表情 簡述
Glaring 𥄫
embarrassed 尷尬
Grimace 古靈精怪
Teasing smile 嘲笑
Evil smile 邪笑
shy 怕羞
unamused 冇趣
Kind smile 有善微笑


耳仔 簡述
Pointy ears 尖耳
Fox ears 狐耳


眼仔 簡述
Aqua eyes 水汪汪
Tsurime 眼角
Glowing eyes 發光
Sclera 眼白
Pupil
Eyelashes 睫毛
tareme 垂眼


嘴仔 簡述


上剎 簡述
Jacket 背心
Hoodie 外套
Dress shirt 衬衫
Tailcoat 燕尾服
Sweater 襴衫


下剎 簡述
Pants
bloomers 燈籠褲
skirt
Pencil skirt 窄脚褲


套装 簡述
Business suit 西装
chemise 連身裙
Ski clothes 滑雪服
Collared dress 有領連身裙
Sleeveless dress 冇袖連身裙


鞋仔 簡述
slippers 拖鞋
Mary janes 瑪麗珍鞋
loafers 樂樂福鞋
Knee boots 過膝長靴
Ballet slippers 芭蕾舞鞋
High heels 高跟鞋
socks


朱耳繩 簡述
Earings 耳環環
Hood 兜兜帽
Crown 后冠
Hair bow 蝴蝶髮夹
Glowes 手套
Hair pin 髮夾


手勢 簡述
waving 招手
Spread arms 張臂
Spread fingers 張指
shushing 噓嘘
Arms up 抬臂
Hands in hair 撥頭
Hand on hip 單手叉腰


姿勢 簡述
Stand
Knees to chest 膝頭頂胸
Knees up 抬膝
sit
run
walk
Lie down
kneel


材質 簡述
Paper style 紙質
Wood 木質
Grey conerete 灰水泥
Marbel 大理石
Gold
Sliver
Metal 金屬
Copper
plastic 塑膠
metallic 金屬質感
foam 泡沬
nendoroid 粘土
gemstones 寶石
crystal 水瞐
sculpture 雕塑
crystal 水晶
mural 壁畫
textured 紋理
Filigret-metal 拉絲金屬
Armor 盔甲
Warframe 機甲
Skeletal 屍體
silk 絲綢
bone
Filigree metal design 花絲金屬設計
Plastic
Wax 臘燭
ice
Dry ice 干冰


自然景觀 簡述
Black smoke 黑烟/黑雾
Smooth fog 弱雾
Cloudy 雲畫
Puffy clouds 雲海
Dramatic clouds 戲劇雲彩
Thunderstorms 暴雨
Stormy ocean 海面暴雨
Ocean backdrop 海洋背景
lightning 閃電
Dawn 日落
Sunrise 日出
rainbow 彩虹
Ethereal fog 薄雾
landscape 地貌
halo 光環環
waterfall 瀑布
Frozen river 冰川
Gloomy night 陰天
Swirlying dust 旋轉塵
Abyss 深渊
Candoluminescence 白冷光
Sea foam 浪花
mist 薄雾
vapor 水滊


珠寶 簡述
Atmospheric 氛圍
Beryl 綠寶石
Carve 雕刻
Chrysoberyl 金綠石
Commercial photography 商業摄影
Copper
Corundum 剛玉
Diamond 鉆石
Feldspar 長石
Garnet 石榴石
gold
Hoolow out 鏤空
hue 色調
inlay 鑲嵌
Intricated details 細節複雜
jade 翡翠
jewelry 寶石
Lazurite 青金石
Liquid 液態
Mirror 鏡面
Olivine 橄欖石
Patterm 花紋
Perfect lighting 燈光
relief 浮雕
Rose quartz 玫瑰石英
Ruby 紅寶石


簡述
A stick of sugar-coated haws 冰糖葫蘆
Roast duck 燒鴨
Box lunch 盒仔飯
Eight-treasure rice pudding 八寶飯
Glass noodles 粉絲
guotie 鍋餅
Hot pot 火鍋
Jellied bean curd 豆腐腦
Konjak tofu 魔芋豆腐
Lotus root 蓮藕
Rice noodles 米粉
Rice tofu 米豆腐
Set meal 套餐
Spring roll(s) 春卷
Steamed twisted rolls 花卷
Tangyuan/Sweet rice dumpling(soup) 元宵
wonton 雲吞


Stable Diffusion改頭换面

Stable Diffusion改頭换面

係舊時對畫像改頭换面,非資深畫家吾得,『Stable Diffusion』局部重繪-今改頭换面變得容易.

  1. 『Stable Diffusion checkpoint』揀『safetensors』
  2. 撳『img2img圖生圖』->『Generation』->『Inpaint局部重繪』
  3. 『拖入畫像Drop Image Here』或『載入畫像Click to Upload』
  4. 揀『Just resize僅調整尺寸』
  5. 『Mask Blur蒙板邊緣模糊值』設『4』
  6. 『Mask mode蒙板模式』->勾『Inpaint masked重繪蒙板像素』
  7. 『Masked Content蒙板區域內容』->勾『original原圖』
  8. 『Inpaint area重繪區域』->勾『Only masked僅蒙板區域』
  9. 『Only masked padding, pixels僅蒙板區域邊緣預留像素』設『32』
  10. 揀『Just resize僅調整尺寸』
  11. 揀『Generate』改頭换面.

Stable Diffusion2.1模型下載安裝

Stable Diffusion2.1模型下載安裝

Stable Diffusion2.1係指v2.1模型

  1. 首先更新Stable Diffusion
  2. 進入『命令行模式CMD
  3. CD去『C:\stable-diffusion-webui』檔䅁夾, 作為本地路徑
cd C:\stable-diffusion-webui
  1. 執行下列安裝指令
git pull


  1. 下載512*512模型『v2-1_512-ema-pruned.ckpt』,配置檔『v2-inference.yaml』改名為『v2-1_512-ema-pruned.yaml』
https://huggingface.co/stabilityai/stable-diffusion-2-1-base/resolve/main/v2-1_512-ema-pruned.ckpt
https://raw.githubusercontent.com/Stability-AI/stablediffusion/main/configs/stable-diffusion/v2-inference.yaml


下載768*768模型『v2-1_768-ema-pruned.ckpt』. 配置檔『v2-inference-v.yaml』改名為『v2-1_768-ema-pruned.yaml』

https://huggingface.co/stabilityai/stable-diffusion-2-1/resolve/main/v2-1_768-ema-pruned.ckpt
https://raw.githubusercontent.com/Stability-AI/stablediffusion/main/configs/stable-diffusion/v2-inference-v.yaml


  1. 將文檔复制到『C:\stable-diffusion-webui\models\Stable-diffusion』
  2. 執行『webui-user.bat』
  3. 啟動『http://192.168.1.8:7860/』
  4. 係webui左上角揀『v2-1_768-ema-pruned.ckpt
  5. CMD』顯示加載v2.1模型


Stable Diffusion網絡共享

Stable Diffusion網絡共享

壹臺『Stable Diffusion』電腦,可以有多塊『NVIDIA-GPU顯卡』,發熱噪聲犀利, 唯有擺係機房仔,係內網用『手機』『平板』『電腦』訪問『Stable Diffusion』.

  1. 編缉『webui-user.bat』
C:\stable-diffusion-webui\webui-user.bat
  1. 對『bat』添加『–listen』参數.
set COMMANDLINE_ARGS=–listen
  1. 𢴇行『webui-user.bat』 ip地埗『http://0.0.0.0:7860』
  2. 『http://0.0.0.0』指本機ip地埗
  3. 進入『命令行模式CMD
  4. 用『ipconfig』睇ipv4地埗係『http://192.168.1.8』, 台台機吾同.
  5. 『http://192.168.1.8:7860』訪問『Stable Diffusion』


係win10仲要防火牆加網埠監聽.

  1. 『控制台』->『windows defender防火牆』->『進皆設定』
  2. 『輸入規則』->『新增規則』
  3. 勾『連接埠』
  4. 勾『TCP(T) 』
  5. 勾『特定本機連接埠』填『7860』
  6. 勾『允許連線』
  7. 勾『網域(D)』『私人(P)』『公用(U)』
  8. 『名稱』填『Stable Diffusion』

Stable Diffusion模型下載

Stable Diffusion模型下載『基礎模型』

當睇到下面信息『Stable Diffusion』已装掂,但係缺『基礎模型』.

No checkpoints found. When searching for checkpoints, looked at:
– file C:\stable-diffusion-webui\model.ckpt
– directory C:\stable-diffusion-webui\models\Stable-diffusion
Can’t run without a checkpoint. Find and place a .ckpt file into any of those locations. The program will exit.

先去『civitai.com』下載模型

https://civitai.com/
https://huggingface.co/

係『Stable Diffusion』左上角揀基礎模型.擴展名『.safetensors』『.ckpt』, 大細係6GB~4GB之間. 『基礎模型』吾可叠加.

『基礎模型』擺係指定檔案夾.

Model模型 檔案夾位置
Checkpoint『.ckpt』 C:\stable-diffusion-webui\models\Stable-diffusion
.safetensors C:\stable-diffusion-webui\models\Stable-diffusion

『基礎模型』添加封面,圖檔名與模型名壹致,同『基礎模型』模型擺係壹起,之後撳『refresh page』刷新.

基礎模型 model.safetensors
封面圖 model.png


Stable Diffusion-下載安裝

Stable Diffusion下載安裝

Stable Diffusion』開源AI划畫畵程式. 輕易係網络下載,部署係電腦行.

https://github.com/AUTOMATIC1111/stable-diffusion-webui

『提示詞』畀『Clip』解讀, 『Diffusion』逐步生成圖像.

『提示詞』->『Clip』->『Diffusion』->『VAE』->『畵』


硬件要求

  1. NVIDIA RTX孖2080Ti-組NVLink.
  2. 固態磁碟吾細於20gb


部署運行環境.

  1. Python下載安装, 必需裝『Python 3.10.6
  2. git下載安装
  3. PyTorch下載安裝
  4. gfpgan
  5. Clip
  6. open_clip
  7. httpx
  8. transformers』模型分詞器.
  9. torchmetrics
  10. open-clip-torch
  11. v1-5-pruned-emaonly.safetensors
  12. Stable Diffusion模型下載


部署Stable Diffusion

  1. 撳『Win+r』填cmd
  2. 碟符『c:』撳『enter』
  3. 撳『.』入『c:』碟根
  4. 『GIT』克隆『Stable Diffusion』, 填下面克隆碼.
git clone https://github.com/AUTOMATIC1111/stable-diffusion-webui
  1. 等待克隆结束, 出現100%-done
  2. 吾对下載『stable-diffusion-webui-1.0.0-pre.zip』版本過舊.
  3. 复制『exe』路徑,『Stable Diffusion』自動复制python. 非『Python 3.10.6』唔匹配.
“C:\Program Files\Python310\python.exe”
  1. 以記事本编輯『C:\stable-diffusion-webui\webui-user.bat』
  2. 编輯『webui-user.bat』
@echo off
set PYTHON=”C:\Program Files\Python310\python.exe”
set GIT=
set VENV_DIR=
set COMMANDLINE_ARGS=–xformers
call webui.bat
  1. 刪『C:\stable-diffusion-webui\venv』資料夾.
  2. 執行『C:\stable-diffusion-webui\webui-user.bat』.
  3. 非『Python 3.10.6』唔匹配.
ERROR:Could not find a version that satisfies the requirement torch
ERROR:NO matching distribution found for torch
  1. 檢查最新版pip時出錯.
WARNING:There was an error checking the latest version of pip.
  1. 手動升級pip至最新版.
python -m pip install –upgrade pip
C:\stable-diffusion-webui\venv\Scripts\python.exe -m pip install –upgrade pip
  1. PyTorch未稳到gpu
RuntimeError: Torch is not able to use GPU; add –skip-torch-cude-test to COMMANDLINE_ARGS variable to disable this check
  1. 跳過gpu檢測, 編輯『webui-user.bat』.
set COMMANDLINE_ARGS=–xformers –skip-torch-cuda-test
  1. 未有裝gfpgan
RuntimeError: Couldn’t install gfpgan.
  1. 未有裝Clip
RuntimeError: Couldn’t install clip.
  1. 未有裝open_clip
RuntimeError: Couldn’t install open_clip.
  1. 未有裝『transformers』模型分詞器.
OSError: Can’t load tokenizer for ‘openai/clip-vit-large-patch14’. If you were trying to load it from ‘https://huggingface.co/models’, make sure you don’t have a local directory with the same name. Otherwise, make sure ‘openai/clip-vit-large-patch14’ is the correct path to a directory containing all relevant files for a CLIPTokenizer tokenizer.
  1. 未有裝httpx
TypeError: AsyncConnectionPool.__init__() got an unexpected keyword argument ‘socket_options’
  1. 未有裝torchmetrics
ImportError: cannot import name ‘_compare_version’ from ‘torchmetrics.utilities.imports’ (C:\stable-diffusion-webui\venv\lib\site-packages\torchmetrics\utilities\imports.py)
  1. 『Stable Diffusion』冇自带模型.需自行下載.
Downloading: “https://huggingface.co/runwayml/stable-diffusion-v1-5/resolve/main/v1-5-pruned-emaonly.safetensors” to C:\stable-diffusion-webui\models\Stable-diffusion\v1-5-pruned-emaonly.safetensors
  1. 若中斷可刪『venv』重构
C:\stable-diffusion-webui\venv
  1. 當妳睇到『http://127.0.0.1:7860』網頁,証明掂左, 『Stable Diffusion』奉行『輵』『殼』分离哲學. 『http://127.0.0.1:7860』係『殼』, 『殼』崩潰吾會會影影響『輵』.
Running on local URL:  http://127.0.0.1:7860


open-clip-torch下載安裝

open-clip-torch下載安裝
open-clip-torch下載安裝

安裝『Stable Diffusion』時未有安裝『open-clip-torch』

changing setting sd_model_checkpoint to v1-5-pruned-emaonly.safetensors [6ce0161689]: AttributeError

Traceback (most recent call last):

AttributeError: ‘NoneType’ object has no attribute ‘lowvram’
  1. 進入『命令行模式CMD
  2. 執行下列安裝指令
pip install open-clip-torch==2.20.0
C:\stable-diffusion-webui\venv\Scripts\python.exe -m pip install open-clip-torch==2.20.0


v1-5-pruned-emaonly.safetensors下載安裝

v1-5-pruned-emaonly.safetensors下載安裝

『Stable Diffusion』冇自带模型,需自行下載,當妳睇到下面信息,下載『v1-5-pruned-emaonly.safetensors』, 之后擺係『C:\stable-diffusion-webui\models\Stable-diffusion\』資料夾.

Downloading: “https://huggingface.co/runwayml/stable-diffusion-v1-5/resolve/main/v1-5-pruned-emaonly.safetensors” to C:\stable-diffusion-webui\models\Stable-diffusion\v1-5-pruned-emaonly.safetensors


https://huggingface.co/runwayml/stable-diffusion-v1-5/resolve/main/v1-5-pruned-emaonly.safetensors Sour
C:\stable-diffusion-webui\models\Stable-diffusion\v1-5-pruned-emaonly.safetensors dest


transformers更新安裝

更新transformers模型分詞器
更新transformers模型分詞器
安裝transformers模型分詞器.

當妳『Stable Diffusion』睇到下面信息,未有裝『transformers』模型分詞器.或版本舊.

OSError: Can’t load tokenizer for ‘openai/clip-vit-large-patch14’. If you were trying to load it from ‘https://huggingface.co/models’, make sure you don’t have a local directory with the same name. Otherwise, make sure ‘openai/clip-vit-large-patch14’ is the correct path to a directory containing all relevant files for a CLIPTokenizer tokenizer.
  1. 進入『命令行模式CMD
  2. 裝『transformers』模型分詞器.
pip install transformers
C:\stable-diffusion-webui\venv\Scripts\python.exe -m pip install transformers
  1. 更新『transformers』 模型分詞器
pip install –upgrade transformers
C:\stable-diffusion-webui\venv\Scripts\python.exe -m pip install –upgrade transformers


torchmetrics下載安裝

torchmetrics下載安裝
torchmetrics下載安裝

安裝『Stable Diffusion』時未有裝『torchmetrics』.

ImportError: cannot import name ‘_compare_version’ from ‘torchmetrics.utilities.imports’ (C:\stable-diffusion-webui\venv\lib\site-packages\torchmetrics\utilities\imports.py)

進入『命令行模式CMD

查版本號

pip show torchmetrics

缷載

pip uninstall torchmetrics

下載0.11.4版本

C:\stable-diffusion-webui\venv\Scripts\python.exe -m pip install torchmetrics==0.11.4


httpx下載安裝

httpx下載安裝
httpx下載安裝

安裝『Stable Diffusion』時報錯

TypeError: AsyncConnectionPool.__init__() got an unexpected keyword argument ‘socket_options’
  1. 進入『命令行模式CMD
  2. 執行下列安裝指令
C:\stable-diffusion-webui\venv\Scripts\python.exe -m pip install httpx==0.24.1 -force-reinstall
python.exe -m pip install httpx==0.24.1 -force-reinstall


OpenCLIP下載安裝

OpenCLIP下載安裝
OpenCLIP下載安裝

安裝『Stable Diffusion』時未裝『open_clip』. 其實亦係『clip

RuntimeError: Couldn’t install open_clip.

進入『open_clip

https://github.com/mlfoundations/open_clip

或者下載『open_clip』落『C:』碟

git clone https://github.com/openai/open_clip.git

下載『open_clip-main.zip』後解壓本地安裝

https://codeload.github.com/mlfoundations/open_clip/zip/refs/heads/main

复制『C:\open_clip』到『C:\stable-diffusion-webui\venv\Scripts』

C:\open_clip Sour
C:\stable-diffusion-webui\venv\Scripts dest

進入『命令行模式CMD

CD去『CLIP』檔䅁夾, 作為本地路徑

cd C:\stable-diffusion-webui\venv\Scripts\open_clip

执行下列安裝指令

C:\stable-diffusion-webui\venv\Scripts\python.exe setup.py build install


常試通過pip指令安裝

pip install open_clip_torch


Clip下載安裝

Clip下載安裝
Clip下載安裝
Clip下載安裝
Clip下載安裝

clip』建构圖像文字之間連系模型,安裝『Stable Diffusion』時未有安裝『clip』.

RuntimeError: Couldn’t install clip.

進入『clip

https://github.com/openai/clip/

下載『clip』落『C:』碟

git clone https://github.com/openai/CLIP.git

或者下載『CLIP-main.zip』後解壓

https://codeload.github.com/openai/CLIP/zip/refs/heads/main

复制『C:\CLIP』到『C:\stable-diffusion-webui\venv\Scripts』

C:\CLIP Sour
C:\stable-diffusion-webui\venv\Scripts dest

進入『命令行模式CMD

CD去『CLIP』檔䅁夾, 作為本地路徑

cd C:\stable-diffusion-webui\venv\Scripts\CLIP

执行下列安裝指令

C:\stable-diffusion-webui\venv\Scripts\python.exe setup.py build install


GFPGAN下載安裝

gfpgan下載安裝
gfpgan下載安裝

安裝『Stable Diffusion』時未有安裝『gfpgan』人樣修复.

RuntimeError: Couldn’t install gfpgan.

進入『GFPGAN

https://github.com/TencentARC/GFPGAN

下載『GFPGAN』落『C:』碟

git clone https://github.com/TencentARC/GFPGAN.git

复制『C:\GFPGAN』到『C:\stable-diffusion-webui\venv\Scripts』

C:\GFPGAN Sour
C:\stable-diffusion-webui\venv\Scripts dest

進入『命令行模式CMD

CD去『GFPGAN』檔䅁夾, 作為本地路徑

cd C:\stable-diffusion-webui\venv\Scripts\GFPGAN

执行下列安裝指令

C:\stable-diffusion-webui\venv\Scripts\python.exe -m pip install basicsr
C:\stable-diffusion-webui\venv\Scripts\python.exe -m pip install facexlib
C:\stable-diffusion-webui\venv\Scripts\python.exe -m pip install -r requirements.txt
C:\stable-diffusion-webui\venv\Scripts\python.exe setup.py develop
C:\stable-diffusion-webui\venv\Scripts\python.exe -m pip install realesrgan


PyTorch下載安裝

PyTorch下載安裝
PyTorch下載安裝
PyTorch下載安裝
PyTorch下載安裝

『Torch』基於神經網络人工智慧輵, 『PyTorch』係『Python』版本

首先确認NVIDIA顯卡支持CUDA版本. 下載最新顯卡驅動『552.22-desktop-win10-win11-64bit-international-nsd-dch-whql.exe』


網络安装『PyTorch

  1. 進『命令行模式CMD
pip3 install torch torchvision torchaudio –index-url https://download.pytorch.org/whl/cu121


本地安装『PyTorch

  1. 進『命令行模式CMD
  2. 行『NVIDIA-SMI.exe
  3. 确認『torch版』+『cuda版』+『python版』+『win/linux版』
  4. 部機『torch-2.3.0』+『cuda-12.4』+『python-3.10.6』+ 『Win-x64』
  5. 版本配對『cp=python』,『cu<=cuda』
https://download.pytorch.org/whl/torch/
  1. 直接将『.whl』下載落蒞直接本地安裝『torch-2.3.0+cu121-cp310-cp310-win_amd64.whl
https://download.pytorch.org/whl/cu121/torch-2.3.0%2Bcu121-cp310-cp310-win_amd64.whl#sha256=002027d18a9c054f08fe9cf7a729e041229e783e065a71349015dcccc9a7137e
  1. 將『.whl』摆係『D:』碟.
  2. 管現員身份進入命令行模式cmd
  3. 『pip install whl “d:\torch-2.3.0+cu121-cp310-cp310-win_amd64.whl”』
  4. 檢查最新版pip時出錯.
WARNING:There was an error checking the latest version of pip.
  1. 管現員身份進入命令行模式cmd
Defaulting to user installation because normal site-packages is not writeable
  1. 手動升級pip至最新版. 以管理員身份𢴇行.
python -m pip install –upgrade pip

測試『Pytorch』返回true,表示可調用GPU-CUDA指令, 進入『Pytho3.10』.

import torch
print(torch.__version__)
torch.cuda.is_available()


缷載tcrch

Pip uninstall torch
Pip uninstall torchaudio torchvision
Pip uninstall torch-geometric torch-scatter torch-sparse torch-cluster torch-spline-conv


https://pytorch.org/get-started/locally/
https://pytorch.org/get-started/previous-versions/