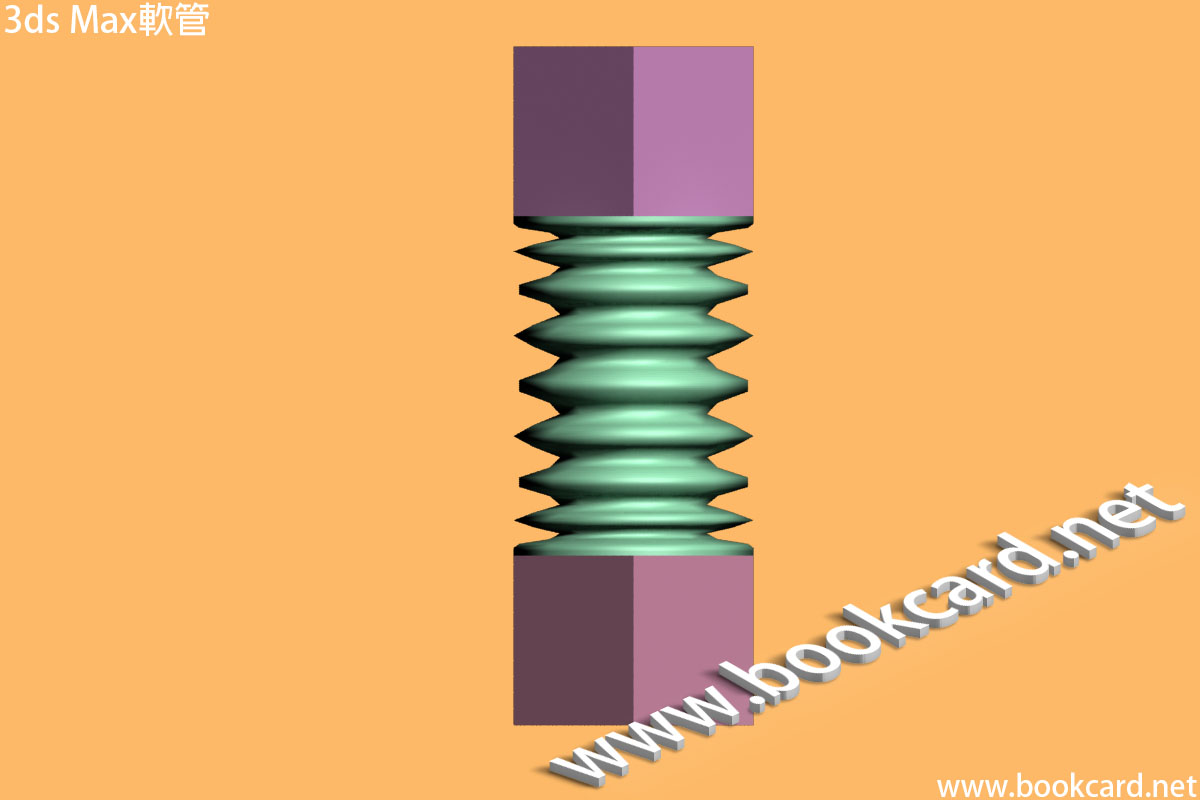
3ds Max『軟管』其特別可於兩端吸附物體.然後拉伸.
- 『創建->擴展幾何體->軟管』Create->Extended Primitives->Hose
- 滑鼠左鍵拖動先拉出圓形.鬆開滑鼠左鍵.
- 再往上拉高形成『管狀』,按滑鼠左鍵確定.
- 勾選『綁定到對象軸』Bound to Object Pivots
- 設『張力』Tension為0
- 『軟管』兩端生成兩個對像
- 『對齊對像』ALT+A將兩個對像與『軟管端面』對齊
- 綁定頂與底對象
| 『端點方法』End Point Method | 簡介 |
| Free Hose | 『自由軟管』,只可設軟管高度 |
| Bound to Object Pivots | 『綁定到對象軸』,一旦綁定到對象,軟管件隨著對像移動而拉伸 |
| 『綁定對象』Binding Objects | 需勾選『綁定到對象軸』Bound to Object Pivots |
| Pick Top Object | 拾取頂部對象 |
| Tension | 『張力』默認100 |
| Pick Bottom Object | 拾取底部對象 |
| Tension | 『張力』默認100 |
| Free Hose Parameters | 『自由軟管參數』 |
| 『高度』Height | 需勾選『自由軟管』Free Hose |
| Common Hose Parameters | 『常用軟管參數』 |
| Segments | 此值為軟管分段.此值越大拉伸時越平滑 |
| Flex Section Enable | 『軟體截面』若開啓軟管呈『摺疊』 |
| Starts | 起始位置 |
| Ends | 結束位置 |
| Cycles | 軟管摺疊量 |
| Diameter | 摺疊部分直徑縮小20% |
| 『平滑』Smoothing | |
| All | 平滑整個對像 |
| Sides | 平滑側面 |
| None | 不平滑 |
| Segments | 分段平滑 |
| Renderable | 可渲染 |
| Generate Mapping Coords | 生成坐標映射 |
| Round Hose | 勾選開啓『圓形軟管』 |
| Diameter | 軟管直徑 |
| Sides | 軟管截面由多條邊組成,默認為8條邊,數值越大圓形越平滑 |
| Rectangular Hose | 勾選開啓『長方形軟管』 |
| Width | 軟管寬 |
| Depth | 軟管深 |
| Fillet | 倒角,若此值較大可將『方形軟管』變為『圓形軟管』 |
| Fillet Segs | 倒角分段 , 此值越大越圓滑. |
| Rotation | 旋轉角度 |
| D-Section Hose | D截面軟管 |
| Width | 軟管寬 |
| Depth | 軟管深 |
| Round Sides | 圓弧面由多條邊組成 |
| Fillet | 對兩直角倒角 |
| Fillet Segs | 倒角分段 ,此值越大越圓滑. |
| Rotation | 旋轉角度 |